Cassetta degli attrezzi

Formattare il testo
Utilizzare i titoli delle sezioni
I titoli delle sezioni fanno automaticamente parte dell'Indice, devono quindi essere strutturati. La loro posizione nella struttura ad albero è regolata dai caratteri '=' alla fine di ogni titolo. Evita di utilizzarne uno da solo perché indica il titolo di una pagina che dovrebbe essere semmai indicato tramite il titolo automatico della pagina. I titoli delle sezioni principali utilizzeranno '==qui il testo==', il livello successivo '===altro testo===' e così via.
Utilizzare il grassetto e il corsivo
Le virgolette singole sono utilizzate per specificare le parole in grassetto e in corsivo.
Utilizza '''grassetto''' per specificare il testo in grassetto e ''corsivo'' per specificare il testo corsivo.
Per arrivare ad ottenere traduzioni semplici ed accurate, segui le linee Linee guida tipografiche.
Aggiungere un frammento di codice
Abbiamo dei modelli per aiutare nella corretta visualizzazione dei frammenti di codice. Esempi d'uso nelle varie situazioni sono disponibili nella pagina Linee guida tipografiche. Codice per vari modelli di riquadri possono essere presi da questa pagina.
Se hai problemi a visualizzare i caratteri pipe nel tuo frammento di codice, consulta la spiegazione e il marcatore in dettaglio su Linee guida tipografiche.
Aggiungere rientri
- ":" è utilizzato per ottenere un rientro. È stato utilizzato ripetuto più volte in alcune vecchie pagine. È una pratica deprecata che causa alcuni problemi, di conseguenza i rientri multipli verranno rimossi non appena trovati. Un singolo ":" inserisce un rientro di quattro caratteri.
Formato delle date
Le date in un formato puramente numerico causano confusione a causa delle differenti interpretazioni a seconda della zona geografica. Formatta le date così
18 Mar 2011
con il mese completo o in forma abbreviata e l'anno nel formato a 4 cifre. Il giorno può essere a singola o doppia cifra.
Elenchi puntati
* è il simbolo da utilizzare per gli elenchi puntati. ** crea un secondo livello:
* Mandorle

* Noci
** Anacardi

* Uvetta
produce
- Mandorle
- Noci
- Anacardi
- Uvetta
Elenchi numerati
Gli elenchi numerati sono create nello stesso modo, ma utilizzando '#'.
# Setacciare
# Mescolare
## Mescolare accuratamente
# Infornare
produce
- Setacciare
- Mescolare
- Mescolare accuratamente
- Infornare
Combinare elenchi puntati e numerati
Puoi avere un sotto-elenco numerato in un elenco puntato e viceversa, come questo:
* Noci
*# Anacardi
*# Matti
* Altre cose
produce
- Noci
- Anacardi
- Matti
- Altre cose
mentre
# Noci
#* Anacardi
#* Matti
# Altre cose
produce
- Noci
- Anacardi
- Matti
- Altre cose
| Nota |
|---|
| Gli elenchi numerati non dovrebbero mai contenere righe vuote: spezzano la sequenza e la numerazione riparte da uno. Allo stesso modo non dovrebbero mai esserci righe vuote prima di un elemento di un sotto-elenco numerato o puntato: si creano due livelli di marcature di elementi (puntati o numerati). |
| Nota |
|---|
| Ricordati che i lunghi elenchi sono un problema per i traduttori. Con elenchi puntati a singolo livello posiziona ogni punto in una sezione a sé, cioè inserisci una riga vuota tra i punti. Con elenchi puntati a due livelli, i sotto-elementi devono essere tenuti nella stessa sezione del loro punto di primo livello di riferimento; se devi utilizzare i sotto-punti, per favore fai in modo che i sotto-elenchi siano corti! Per quanto riguarda gli elenchi numerati devi tenere tutto in una sola unità. Per favore cerca di evitare gli elenchi numerati e se proprio devi utilizzarli cerca di farli brevi. |
Suddivisione in punti
Le suddivisioni in punti sono create utilizzando ; e : alternativamente. Sono perfetti per descrivere brevemente un gruppo di oggetti correlati.
;Animali
: Si spostano in giro e divorano altre creature.

;Piante
: Hanno radici e si nutrono di acqua dal terreno e di sole.
produce
- Animali
- Si spostano in giro e divorano altre creature.
- Piante
- Hanno radici e si nutrono di acqua dal terreno e di sole.
Aggiungere un collegamento
There are two kinds of links to learn, internal ones, to another userbase page, and external URL links.
Per un collegamento interno il formato [[Typographical_Guidelines]], nel punto in cui vuoi visualizzare il nome della pagina, funziona, ma non è l'ideale, in particolare per traduzioni in docbook e per la localizzazione. È meglio utilizzare la forma [[Special:myLanguage/Typographical_Guidelines|Struttura della pagina]] perché questa permette ai traduttori di collegare correttamente le pagine anche se i nomi sono tradotti. Il risultato è che l'utente verrà portato nella pagina correttamente tradotta, se ne esiste una. Spesso avrai bisogno di includere il collegamento in una frase, in questo caso utilizza
[[Special:myLanguage/Typographical_Guidelines|this page]]
which displays
External links are slightly different so
[http://techbase.kde.org/Schedules our road map]
displays
our road map, which would take you straight to the techbase page.
One last thing to note - when you preview your page, all links are live. This gives you two benefits. You can check (by hovering) that your links are set up as you expected, and you can use a red link to create a new page.
Illustrate Your Text
Add a single image, centered
[[Image:KMail-kde4.png|250px|center]]
Note that you can change the position of the image, but the default is left. The size of the image depends on the circumstances, but for screenshots I recommend no less than 250px and no more than 500px.
Make the Image Clickable, and Add a Caption
Where you need to show more detail, create a moderately sized image, clickable, so that the full-size can be seen. Simply add the parameter '|thumb' within the image parentheses.
A caption can also be added as a parameter, but will only show if '|thumb' is present.
Use Tables to Precisely Place Multiple Images
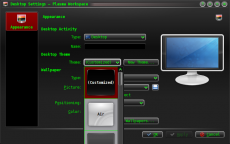
{|class="tablecenter" style="border: 1px solid grey;"
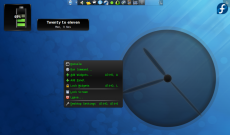
|[[Image:Desktop-config-customized.png|230px|center]]||[[Image:Desktop-settings-rightclick.png|230px|center]]
|-
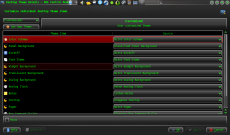
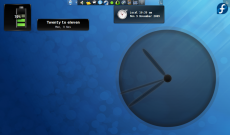
|[[Image:Desktop-theme-details-dialog.png|230px|center]]||[[Image:Plasma-multiple-themes.png|230px|center]]
|}
displays
 |
 |
 |
 |
Note that all the parameters for one image are contained within [[...]], and cells are separated by '||'. To start a new line, insert '|-' on an otherwise-empty line, then '|' at the start of the next one.
Add Notes and Warnings
Where a note or warning is relevant within your text, use these templates:
{{Info|This is general information}} displays

{{Note|Some important information at this point}} displays

{{Tip|A helpful piece of advice, something to remember}}displays

{{Warning|Take care - this is a dangerous thing to do}} displays

Where the strongest possible warning is needed, the Remember box can be used, but please use sparingly.
{{Remember|1=This is for things that definitely must not be forgotten}}

| Remember |
|---|
| This is for things that definitely must not be forgotten |
You can also change the heading:

| Remember |
|---|
You can use parameter number 3 to set an individual box heading:
{{Remember|3=Don't Forget This!|1=You can use...}} |
Other Useful Templates
Inserting GUI Icons
The best way to refer to icons in the GUI is to display it in the text. This can be done with a template like this: {{Icon|list-add}}. This will display the ![]() icon.
icon.
For this to work, the icon image must have been uploaded to the wiki. See Update an Image for an explanation on how to upload images. The .png files can usually be found here: usr/share/icons/oxygen. If possible use the 16x16 icon. The file name should have an Icon- prefix as in Icon-list-add.png — apart from the prefix the filename should exactly match the usual name. Note, that when using the template you should neither write the Icon- prefix nor the .png file type extension.
The ![]() icon can also be written as
icon can also be written as {{Plus}}, and the ![]() icon as
icon as {{Minus}}. You can also use {{Configure}} to get the
![]() icon, and
icon, and {{Exit}} gets you the
![]() icon.
icon.
Making Major Edits to Existing Pages
If a page is likely to be open for editing for some time there is a danger of conflicts - someone else may edit at the same time, and saving your edit will cancel out theirs, or vice versa. The way to avoid that is to make a temporary entry, directly under the language bar, using {{Being_Edited}} which will display

| Currently Being Edited |
|---|
| This page is currently being edited. If this notice persists for an unreasonable time, please either notify irc.freenode.org #kde-www or report on Annewilson's Talk page. |
Don't forget to remove it when you have finished!
Adding a New Complex Page
If you need to be able to work on a page for quite some time, over several days, for instance, you may like to use the Construction template - {{Construction}}, which displays
Adding a List of Sub-Pages
== Subpages of {{FULLPAGENAME}} ==
{{Special:PrefixIndex/{{FULLPAGENAME}}/}}
is very useful when you want to list subpages with active links, such as
Subpages of Toolbox/it
It does, however, also list all "other-language" pages, so use with discretion.

