Toolbox/pt-br: Difference between revisions
No edit summary |
No edit summary |
||
| Line 52: | Line 52: | ||
** Cashews | ** Cashews | ||
* | * Raisins | ||
=== Enumerações === | === Enumerações === | ||
Revision as of 22:17, 27 April 2012

Formatar seu texto
Usar cabeçalhos
Cabeçalhos automaticamente fazem parte de sua Tabela de Conteúdos, então precisam ser estruturados. Seus lugares na árvore é regido por vários '=' caracteres no final do cabeçalho. Evite usar um único - que indica um cabeçalho de página e o cabeçalho de página automático deve ser usado. Seus cabeçalhos principais usarão '== texto vai aqui ==', o próximo nível, '=== mais texto ===' e assim por diante.
Usar negrito e itálico
Aspas são usadas para especificar palavras em negrito e itálico.
Use '''bold text''' para especificar texto em negrito e ''italic text'' para especificar texto em itálico.
Para que possamos garantir traduções fáceis e precisas, por favor, respeitem o guia tipográfico.
Adicionar um trecho de código
Nós temos modelos para auxiliar na correta exibição de trechos de código. Exemplos de uso em várias situações estão disponíveis na página do guia tipográfico. Código para os vários modelos de caixa podem ser encontrados nessa página.
Se você tem problemas com exibição de caracteres pipe no seu trecho de código, por favor, veja a explicação e marcação detalhada no [[Special:myLanguage/Typographical_Guidelines|Guia Tipográfico]
Adicionar recuos
- ":" é usado para um recuo e foi usado em múltiplos em várias páginas antigas. Isso está obsoleto e causa alguns problemas, por isso os múltiplos serão removidos a medida que forem encontrados. Um simples ":" recua por quatro caracteres.
Formatar datas
Datas em um formato puramente numérico causam confusão, devido às diferenças nas expectativas das zonas geográficas. Por favor, formate as datas como
18 Mar 2011
com o nome completo do mês ou na forma abreviada, e o ano no formato de 4 digitos. O dia pode ser com um único digito ou com dois.
Listas com marcadores
* é o símbolo para usar em listas com marcadores. ** fornece um segundo nível:
* Almonds

* Nuts
** Cashews

* Raisins
produz
- Almonds
- Nuts
- Cashews
- Raisins
Enumerações
Enumerações são produzidas da mesma forma, usando '#'.
# Sift
# Mix
## Stir thoroughly
# Bake
produz
- Sift
- Mix
- Stir thoroughly
- Bake
Combinando listas com marcadores e enumerações
Você pode ter uma sublista enumerada em uma lista com marcadores e vice e versa, como essa:
* Nuts
*# Cashew
*# Crazy
* Other things
produces
- Nuts
- Cashew
- Crazy
- Other things
while
# Nuts
#* Cashew
#* Crazy
# Other things
produces
- Nuts
- Cashew
- Crazy
- Other things


Itemizations
Itemizations are produced using ; and : alternately. They are best for giving short descriptions for a group of related objects.
;Animals
: They move around and devour other creatures.

;Plants
: They have roots and feed upon ground water and sun.
produces
- Animals
- They move around and devour other creatures.
- Plants
- They have roots and feed upon ground water and sun.

Add a Link
There are two kinds of links to learn, internal ones, to another TechBase page, and external URL links.
For an internal link the format [[Typographical_Guidelines]], where you want to display the name of the page, does work, but it is not ideal, particularly for translation to docbook and for localisation. It is better to use the form [[Special:myLanguage/Typographical_Guidelines|Typographical Guidelines]], because that allows translators to link correctly even though the page name is localised. The result is that it directs to the correctly translated page, if one exists. You often need to include the link in a sentence, so in that case you would use
[[Special:myLanguage/Typographical_Guidelines|this page]]
which displays
External links are slightly different so
[http://techbase.kde.org/Schedules our road map]
displays
our road map, which would take you straight to the techbase page.
One last thing to note - when you preview your page, all links are live. This gives you two benefits. You can check (by hovering) that your links are set up as you expected, and you can use a red link to create a new page.
Illustrate Your Text
Add a single image, centered
[[Image:KMail-kde4.png|250px|center]]
Note that you can change the position of the image, but the default is left. The size of the image depends on the circumstances, but for screenshots I recommend no less than 250px and no more than 500px.
Make the Image Clickable, and Add a Caption
Where you need to show more detail, create a moderately sized image, clickable, so that the full-size can be seen. Simply add the parameter '|thumb' within the image parentheses.
A caption can also be added as a parameter, but will only show if '|thumb' is present.
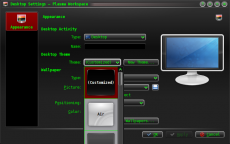
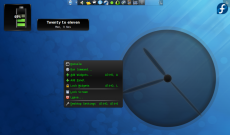
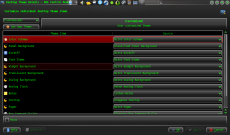
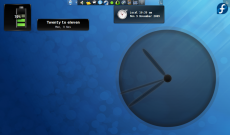
Use Tables to Precisely Place Multiple Images
{|class="tablecenter" style="border: 1px solid grey;"
|[[Image:Desktop-config-customized.png|230px|center]]||[[Image:Desktop-settings-rightclick.png|230px|center]]
|-
|[[Image:Desktop-theme-details-dialog.png|230px|center]]||[[Image:Plasma-multiple-themes.png|230px|center]]
|}
displays
 |
 |
 |
 |
Note that all the parameters for one image are contained within [[...]], and cells are separated by '||'. To start a new line, insert '|-' on an otherwise-empty line, then '|' at the start of the next one.
Add Notes and Warnings
Where a note or warning is relevant within your text, use these templates:
{{Info|This is general information}} displays

{{Note|Some important information at this point}} displays

{{Tip|A helpful piece of advice, something to remember}}displays

{{Warning|Take care - this is a dangerous thing to do}} displays

Where the strongest possible warning is needed, the Remember box can be used, but please use sparingly.
{{Remember|1=This is for things that definitely must not be forgotten}}

| Remember |
|---|
| This is for things that definitely must not be forgotten |
You can also change the heading:

| Remember |
|---|
You can use parameter number 3 to set an individual box heading:
{{Remember|3=Don't Forget This!|1=You can use...}} |
Other Useful Templates
Inserting GUI Icons
The best way to refer to icons in the GUI is to display it in the text. This can be done with a template like this: {{Icon|list-add}}. This will display the ![]() icon.
icon.
For this to work, the icon image must have been uploaded to the wiki. See Update an Image for an explanation on how to upload images. The .png files can usually be found here: usr/share/icons/oxygen. If possible use the 16x16 icon. The file name should have an Icon- prefix as in Icon-list-add.png — apart from the prefix the filename should exactly match the usual name. Note, that when using the template you should neither write the Icon- prefix nor the .png file type extension.
The ![]() icon can also be written as
icon can also be written as {{Plus}}, and the ![]() icon as
icon as {{Minus}}. You can also use {{Configure}} to get the
![]() icon, and
icon, and {{Exit}} gets you the
![]() icon.
icon.
Making Major Edits to Existing Pages
If a page is likely to be open for editing for some time there is a danger of conflicts - someone else may edit at the same time, and saving your edit will cancel out theirs, or vice versa. The way to avoid that is to make a temporary entry, directly under the language bar, using {{Being_Edited}} which will display

| Currently Being Edited |
|---|
| This page is currently being edited. If this notice persists for an unreasonable time, please either notify irc.freenode.org #kde-www or report on Annewilson's Talk page. |
Don't forget to remove it when you have finished!
Adding a New Complex Page
If you need to be able to work on a page for quite some time, over several days, for instance, you may like to use the Construction template - {{Construction}}, which displays
Adding a List of Sub-Pages
== Subpages of {{FULLPAGENAME}} ==
{{Special:PrefixIndex/{{FULLPAGENAME}}/}}
is very useful when you want to list subpages with active links, such as
Subpages of Toolbox/pt-br
It does, however, also list all "other-language" pages, so use with discretion.

