Development/Tutorials/Qt4 Ruby Tutorial/Chapter 07/ru: Difference between revisions
Aspotashev (talk | contribs) Created page with "=== Обзор ===" |
Aspotashev (talk | contribs) Created page with "Этот пример показывает, как можно создать свои виджеты с сигналами и слотами, а также как их соеди..." |
||
| Line 18: | Line 18: | ||
=== Обзор === | === Обзор === | ||
Этот пример показывает, как можно создать свои виджеты с сигналами и слотами, а также как их соединять более сложным образом. Теперь исходный код разделён на несколько файлов. | |||
=== Line by Line Walkthrough === | === Line by Line Walkthrough === | ||
Revision as of 17:45, 2 July 2011
Development/Tutorials/Qt4 Ruby Tutorial/Chapter 07
Languages: عربي | Asturianu | Català | Česky | Kaszëbsczi | Dansk | Deutsch | English | Esperanto | Español | Eesti | فارسی | Suomi | Français | Galego | Italiano | 日本語 | 한국어 | Norwegian | Polski | Português Brasileiro | Română | Русский | Svenska | Slovenčina | Slovenščina | српски | Türkçe | Tiếng Việt | Українська | 简体中文 | 繁體中文
| Серия примеров | Введение в программирование на Qt®4 на языке Ruby |
| Необходимо знать | Tutorial 6 - Building Blocks Galore! |
| Следующий пример | Tutorial 8 - Preparing for Battle |
| Литература | нет |
Одно приводит к другому

Файлы:
Обзор
Этот пример показывает, как можно создать свои виджеты с сигналами и слотами, а также как их соединять более сложным образом. Теперь исходный код разделён на несколько файлов.
Line by Line Walkthrough
This file is mainly lifted from Chapter 6; only the non-trivial changes are noted here.
signals 'valueChanged(int)'
slots 'setValue(int)'
def value()
  @slider.value()
end

def setValue(value)
  @slider.setValue(value)
end
These make up an interface between this widget and other components in a program. Until now, LCDRange didn't really have an API at all.
value() is a public function for accessing the value of the LCDRange, setValue() is our first custom slot, and valueChanged() is our first custom signal.
Slots must be implemented in the normal way (a slot is also a Ruby member function). Signals are automatically implemented. Signals follow the access rules of protected Ruby functions (i.e., they can be emitted only by the class they are defined in or by classes inheriting from it).
The valueChanged() signal is used when the LCDRange's value has changed.
The implementation of value() is straightforward. It simply returns the slider's value.
The implementation of setValue() is equally straightforward. Note that because the slider and LCD number are connected, setting the slider's value automatically updates the LCD number as well. In addition, the slider will automatically adjust the value if it is outside its legal range.
connect(@slider, SIGNAL('valueChanged(int)'),
        lcd, SLOT('display(int)'))
connect(@slider, SIGNAL('valueChanged(int)'),
        self, SIGNAL('valueChanged(int)'))
The first QObject::connect() call is the same that you have seen in the previous chapter. The second is new; it connects slider's QAbstractSlider::valueChanged() signal to this object's valueChanged() signal. Yes, that's right. Signals can be connected to other signals. When the first is emitted, the second signal is also emitted.
Let's look at what happens when the user operates the slider. The slider sees that its value has changed and emits the QAbstractSlider::valueChanged() signal. That signal is connected both to the QLCDNumber::display() slot of the Qt::LCDNumber and to the valueChanged() signal of the LCDRange.
Thus, when the signal is emitted, LCDRange emits its own valueChanged() signal. In addition, QLCDNumber::display() is called and shows the new number.
Note that you're not guaranteed any particular order of execution; LCDRange::valueChanged() may be emitted before or after QLCDNumber::display() is called.
previousRange = nil

for row in 0..2
  for column in 0..2
    lcdRange = LCDRange.new()
    grid.addWidget(lcdRange, row, column)
    unless previousRange.nil?
      connect(lcdRange, SIGNAL('valueChanged(int)'),
              previousRange, SLOT('setValue(int)'))
    end
    previousRange = lcdRange
  end
end
When we create the nine LCDRange objects, we connect them using the signals and slots mechanism. Each has its valueChanged() signal connected to the previous one's setValue() slot. Because LCDRange emits the valueChanged() signal when its value changes, we are here creating a chain of signals and slots.
Running the Application
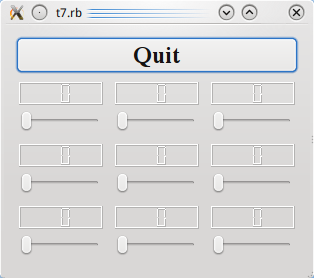
On startup, the program's appearance is identical to the previous one. Try operating the slider to the bottom-right.
Exercises
Use the bottom-right slider to set all LCDs to 50. Then set all but the last LCD to 40 by clicking once to the left of the bottom-middle slider handle. Now, use the bottom-left slider to set the first seven LCDs back to 50.
Click to the left of the handle on the bottom-right slider. What happens? Why is this the correct behavior?
