Development/Tutorials/KCmdLineArgs (ko)
| Tutorial Series | Beginner Tutorial |
| Previous | Tutorial 4 - 로드하기와 저장하기 |
| What's Next | Tutorial 6 - ### (TODO User:milliams) |
| Further Reading | KCmdLineArgs KCmdLineOptions |
개요
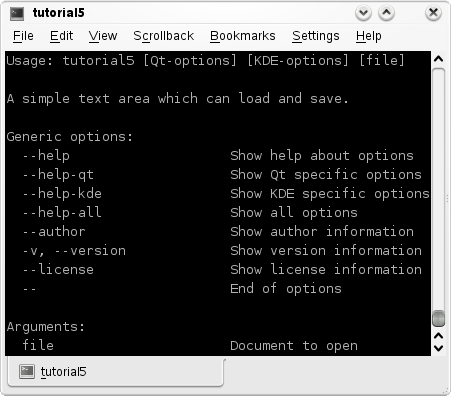
이제 우리는 파일을 열고, 저장하는 텍스트 에디터를 갖는다. 우리는 컴맨드 라인 인자로부터 또는 Dolphin에서 ~로 열기를 사용하여 파일을 여는 것을 가능한 데스크탑 어플리케이션 처럼 동작하도록 만들 것이다.
Now that we have a text editor which can open and save files. We will now make the editor act more like a desktop application by enabling it to open files from command line arguments or even using Open with from within Dolphin.

코드
main.cpp
#include <KApplication>
#include <KAboutData>
#include <KCmdLineArgs>
#include <KUrl> //new

#include "mainwindow.h"

int main (int argc, char *argv[])
{
  KAboutData aboutData( "tutorial5", "tutorial5",
      ki18n("Tutorial 5"), "1.0",
      ki18n("A simple text area which can load and save."),
      KAboutData::License_GPL,
      ki18n("Copyright (c) 2007 Developer") );
  KCmdLineArgs::init( argc, argv, &aboutData );

  KCmdLineOptions options; //new
  options.add("+[file]", ki18n("Document to open")); //new
  KCmdLineArgs::addCmdLineOptions(options); //new

  KApplication app;

  MainWindow* window = new MainWindow();
  window->show();

  KCmdLineArgs *args = KCmdLineArgs::parsedArgs(); //new
  if(args->count()) //new
  {
    window->openFile(args->url(0).url()); //new
  }

  return app.exec();
}
mainwindow.h
#ifndef MAINWINDOW_H
#define MAINWINDOW_H

#include <KXmlGuiWindow>
#include <KTextEdit>

class MainWindow : public KXmlGuiWindow
{
  Q_OBJECT

  public:
    MainWindow(QWidget *parent=0);
    void openFile(const QString &inputFileName); //new

  private:
    KTextEdit* textArea;
    void setupActions();
    QString fileName;

  private slots:
    void newFile();
    void openFile();
    void saveFile();
    void saveFileAs();
    void saveFileAs(const QString &outputFileName);
};

#endif
mainwindow.cpp
#include "mainwindow.h"

#include <KApplication>
#include <KAction>
#include <KLocale>
#include <KActionCollection>
#include <KStandardAction>
#include <KFileDialog>
#include <KMessageBox>
#include <KIO/NetAccess>
#include <KSaveFile>
#include <QTextStream>

MainWindow::MainWindow(QWidget *parent)
    : KXmlGuiWindow(parent),
      fileName(QString())
{
  textArea = new KTextEdit;
  setCentralWidget(textArea);

  setupActions();
}

void MainWindow::setupActions()
{
  KAction* clearAction = new KAction(this);
  clearAction->setText(i18n("Clear"));
  clearAction->setIcon(KIcon("document-new"));
  clearAction->setShortcut(Qt::CTRL + Qt::Key_W);
  actionCollection()->addAction("clear", clearAction);
  connect(clearAction, SIGNAL(triggered(bool)),
          textArea, SLOT(clear()));

  KStandardAction::quit(kapp, SLOT(quit()),
                        actionCollection());

  KStandardAction::open(this, SLOT(openFile()),
                        actionCollection());

  KStandardAction::save(this, SLOT(saveFile()),
                        actionCollection());

  KStandardAction::saveAs(this, SLOT(saveFileAs()),
                        actionCollection());

  KStandardAction::openNew(this, SLOT(newFile()),
                        actionCollection());

  setupGUI();
}

void MainWindow::newFile()
{
  fileName.clear();
  textArea->clear();
}

void MainWindow::saveFileAs(const QString &outputFileName)
{
  KSaveFile file(outputFileName);
  file.open();

  QByteArray outputByteArray;
  outputByteArray.append(textArea->toPlainText());
  file.write(outputByteArray);
  file.finalize();
  file.close();

  fileName = outputFileName;
}

void MainWindow::saveFileAs()
{
  saveFileAs(KFileDialog::getSaveFileName());
}

void MainWindow::saveFile()
{
  if(!fileName.isEmpty())
  {
    saveFileAs(fileName);
  }
  else
  {
    saveFileAs();
  }
}

void MainWindow::openFile() //changed
{
  openFile(KFileDialog::getOpenFileName());
}

void MainWindow::openFile(const QString &inputFileName) //new
{
  QString tmpFile;
  if(KIO::NetAccess::download(inputFileName, tmpFile,
         this))
  {
    QFile file(tmpFile);
    file.open(QIODevice::ReadOnly);
    textArea->setPlainText(QTextStream(&file).readAll());
    fileName = inputFileName;

    KIO::NetAccess::removeTempFile(tmpFile);
  }
  else
  {
    KMessageBox::error(this,
        KIO::NetAccess::lastErrorString());
  }
}
tutorial4ui.rc
<?xml version="1.0" encoding="UTF-8"?>
<gui name="tutorial5"
     version="1"
     xmlns="http://www.kde.org/standards/kxmlgui/1.0"
     xmlns:xsi="http://www.w3.org/2001/XMLSchema-instance"
     xsi:schemaLocation="http://www.kde.org/standards/kxmlgui/1.0
                         http://www.kde.org/standards/kxmlgui/1.0/kxmlgui.xsd" >

  <MenuBar>
    <Menu name="file" >
      <Action name="clear" />
    </Menu>
  </MenuBar>

  <ToolBar name="mainToolBar" >
    <text>Main Toolbar</text>
    <Action name="clear" />
  </ToolBar>

</gui>
이것은 tutorialx가 이제는 tutorial5라는 것을 제외하고는 마지막 두 튜트리얼의 tutorialxui.rc와 동일하다.
- This is identical to the tutorialxui.rc from the last two tutorials except tutorialx is now tutorial5.
설명
mainwindow.h
여기서 우리는 아무것도 하지 않지만, QString을 인자로 갖는 openFile함수를 추가한다.
Here we have done nothing but add a new openFile function which takes a QString
void openFile(const QString &inputFileName);
mainwindow.cpp
여기에는 단지 재배열 되었을 뿐, 새로 추가된 코드가 없다. 모든 것은 void openFile()에서 KFileDialog::getOpenFileName()를 호출하는 것을 제외하고, void openFile(const QString &inputFileName)으로 이동하였다.
There's no new code here, only rearranging. Everything from void openFile() has been moved into void openFile(const QString &inputFileName) except the call to KFileDialog::getOpenFileName().
만약 다이얼로그를 보여주기를 원하다면, 우리는 openFile() 을 호출할 수 있으며, 파일의 이름을 이미 알고 있다면, openFile(QString)를 호출할 수 있다.
This way, we can call openFile() if we want to display a dialog, or we can call openFile(QString) if we know the name of the file already.
main.cpp
이것이 KCmdLineArgs 마술이 일어나는 곳이다.
This is where all the KCmdLineArgs magic happens.
Make, Install And Run
CMakeLists.txt
project(tutorial5)

find_package(KDE4 REQUIRED)
include_directories( ${KDE4_INCLUDES} )

set(tutorial5_SRCS
  main.cpp
  mainwindow.cpp
)

kde4_add_executable(tutorial5 ${tutorial5_SRCS})

target_link_libraries(tutorial5 ${KDE4_KDEUI_LIBS}
                                ${KDE4_KIO_LIBS})

install(TARGETS tutorial5 DESTINATION ${BIN_INSTALL_DIR})
install( FILES tutorial5ui.rc
         DESTINATION  ${DATA_INSTALL_DIR}/tutorial5 )
이 파일로 튜트리얼은 빌드 가능하며, 튜트리얼 3와 4와 같은 방식으로 동작한다. 좀 더 많은 정보를 위해서는 튜트리얼 3을 보라.
With this file, the tutorial can built and run in the same way as tutorial 3 and 4. For more information, see tutorial 3.
mkdir build && cd build
cmake .. -DCMAKE_INSTALL_PREFIX=$HOME
make install
$HOME/bin/tutorial5
나아가기
Now you can move on to the ### (TODO User:milliams) tutorial.
