Marble/HistoricalMaps: Difference between revisions
| Line 62: | Line 62: | ||
Create a new directory (e.g. "stereo") and move the tar-ball inside. Inside this directory untar the tarball like this: | Create a new directory (e.g. "stereo") and move the tar-ball inside. Inside this directory untar the tarball like this: | ||
tar xvzf | tar xvzf Stereographic2platecarree_lgpl.tar.gz | ||
and then execute | and then execute | ||
Revision as of 22:33, 15 November 2011
Historical Maps for Marble
So you want to add a historical map to Marble. This is great since we want to see lots of historical maps in Marble where the user can browse through space and time. There are lots of very early world maps that are under the public domain. You'll find several on Wikipedia. A pretty comprehensive list of all early world maps is available at:
[| Map List translated via Google Translate]
You can choose a map from that list (or a different place. The map you choose should
- cover the whole world as it was known at that time (or at least much of it)
- have a resolution that is high<(i> enough (ideally starting around 2000x1500 pixel and above).
- have a proper license (Public Domain or CC by SA 3.0 would be alright)
- feature some interesting details that make it stand out against others (that is usually the case).
- be readable (avoid blurry ones).
- be provided in a projection that is easy to reproject
Reprojection is necessary to allow Marble to make use of the map. Generally early world maps are available in the following categories.
- Stereographic Projection (the two hemispheres are displayed as two circles/discs) - This one is pretty straight-forward to reproject (but takes some time nevertheless). [[1]]
- Mercator Projection - These can be used quite easy "as is" and don't require reprojection. [[2]]
- Other projections - These could be either maps which have no real projection or maps which have a more fancy projection. These maps are usually not very straight-forward to reproject.
If you haven't worked on historical maps, we suggest to start with the stereographically projected maps ("A"):
A. Reprojecting maps provided in Stereographic Projection
Step 1: Download
Download the raw file. As an example we start off with this nice map from Jodocus Hondius made in 1595:
This map has a resolution of 3.281 × 2.343 which gives us good details.
We create a directory "hondius1595" and save our raw file "1595_Vera_Totius_Hondius.jpg" there.
Step 2: Cropping the hemispheres
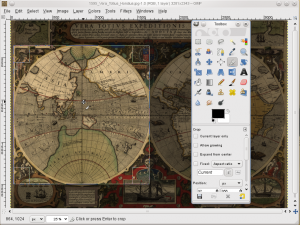
We need to crop the two hemispheres and we need to save them in two different files. You can use Krita, Gimp or Photoshop for that. Make use of the "Crop" tool:
You should crop each circle so that the circular outline of the map is preserved:
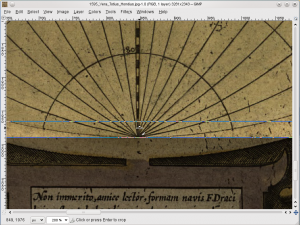
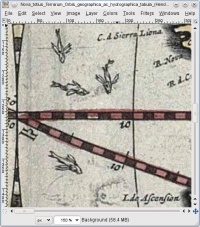
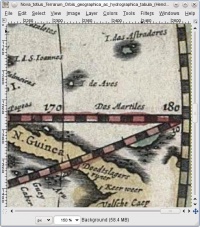
Some of the maps have a black-white "dashed" degree scale that serves as a circular outline. It's important that the dashed scale gets included as well! This needs to be the case on the "inner" side as well as on the "outer" side. Here is a different example which has the inner side of the scale bar discontinued but we still crop as if it was still there:
Save the two hemispheres in two different files. Make sure that you choose "PPM" as a file format!
Now we should have the two PPM files of the two hemispheres in our directory (in our example it's "1595_Vera_Totius_Hondius_east.ppm" and "1595_Vera_Totius_Hondius_west.ppm").
Step 3: Reproject the hemisphere files
If you haven't done so, please download the stereographics conversion tool from here:
File:Stereographic2platecarree lgpl.tar.gz
Create a new directory (e.g. "stereo") and move the tar-ball inside. Inside this directory untar the tarball like this:
tar xvzf Stereographic2platecarree_lgpl.tar.gz
and then execute
make
inside the directory.
For convenience you can copy the resulting stereographic2platecarree executable into the directory that contains your map files (in our example that is the "hondius" directory.
Step4: Concatenate the two hemispheres
Step5: Normalize the longitude
Step6: Retouch the resulting map
Step7: Create a dgml file
Step8: Create a preview icon
Step9: Create the legend entries
Step10: Package the historic map
If you want to learn more about early world maps then have a look [[3]]
(please add further ones to the list as you find them) and elsewhere on the internet:
-- Magnus has completed this one already
-- Magnus has completed this one already
- Leonhard Euler World Map 1760
- Moll - A new map of the world with the trade winds
- Nova Orbis Tabula in Lucem Edita (Magnus is working on this one)
- Universalis cosmographia secundum Ptholomaei traditionem et Americi Vespucii alioru[m]que lustrationes. (General information)
- Behaim Globe: TODO: figuring out the license of the files that we have found.
Licensing
If you find new maps it's always important to check the license. Although ancient maps should usually be under the public domain there are several people who claim copyright on the data due to the image manipulation work they have done as a part of post-processing the scan. No matter whether this is legitimate or not we should respect those claims and look for data that was intended to be published under the public domain (or another free license) and use that.
It's important to note that people like to distribute imagery "free for non-commercial usage". Unfortunately we are not able to use and distribute this data as this would e.g. prohibit most Linux Distributors from distributing our software. So do not use data that is "free for non-commercial use"! It's not suitable for our purposes. If you think that there is a chance that the author might agree to change the license to a less restrictive one then it might be worth to contact him. However pretty often the "non-commercial" wording is provided intentionally this way to allow for a business case of the author.
Preparing Historical Maps for use in Marble
Maps for Marble need to get provided in plate carrée projection (also referred to as "Equirectangular projection"):
There are morphing tools that will let you morph ancient maps into the desired projection. It doesn't require too many skills. Just some patience and love to detail.
You can use xmorph/gtkmorph to morph the images. It is a old piece of software, and is not actively maintained anymore. However it is mature enough for what we need. It likely is in your distribution's repository, if not you can get it on sourceforge.
To load the image you want to choose into gtkmorph, click on the "Load image" button on the "input image" window. You can adjust where the mesh's position and the image size, it will be easier if you roughly align the mesh with map before you start. But before you click "Apply", you must change the resolution on the resulting image, to do this you need to change the "width" and "height" on the bottom of the "resulting image" window.
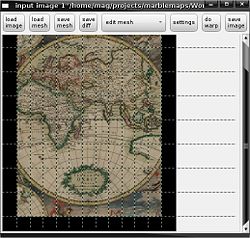
Be careful as gtkmorph has a tendency to crop the images, even if the resulting image is the same resolution as the original!!
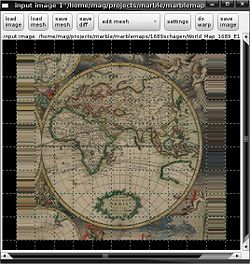
By default you there are only a few mesh lines, to get more right-click on the field and choose "add horizontal line" and "add vertical line" - there appears to be a hotkey, but that don't seem to work. You can also set the minimum amount of lines to ~50 by editing the libmorph/morph.c line 48 & 49, but that may be going too .
Once you've got it all setup you are gonna start on the more repetitive task, you're gonna need to place the yellow dots so that the grid aligns with the grid on the map.
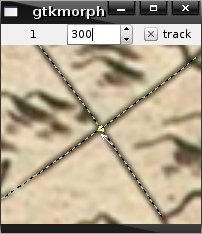
If you align every second line on the mesh to every line on the map, that will give you some wiggle room if the line between two dots don't really follow the line on the map.
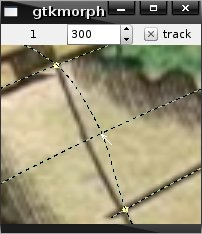
Once you have set all the yellow dots you simply click the 'do warp' button and about a half a minute later you'll hopefully have something like this: Then save the image by clicking on the 'save image' button, the result should be a square map that can be used in Marble. Save the mesh, and export the image, .PPM and .PNG should be a good choice of format.

