Development/Tutorials/Shell Scripting with KDE Dialogs
Development/Tutorials/Shell_Scripting_with_KDE_Dialogs
Languages: عربي | Asturianu | Català | Česky | Kaszëbsczi | Dansk | Deutsch | English | Esperanto | Español | Eesti | فارسی | Suomi | Français | Galego | Italiano | 日本語 | 한국어 | Norwegian | Polski | Português Brasileiro | Română | Русский | Svenska | Slovenčina | Slovenščina | српски | Türkçe | Tiếng Việt | Українська | 简体中文 | 繁體中文
Introduction and Scope
There are some misconceptions that KDE is only a graphical environment. While it is true that KDE is an outstanding desktop environment, the Unix heritage of command line and scripting is also well supported by KDE. In particular, KDE applications can be controlled from the command line, and shell scripts can make use of some of the KDE widget set.
To use this tutorial, you'll need to have some basic familiarity with command line fundamentals, and be at least aware of shell scripting. Like any other programming environment, effective shell scripting requires solid knowledge of the environment. However, you should be able to make sense of the examples with only basic understanding. The downside to this is that if you are very familiar with shell scripting, some of the explanation is likely to be redundant.
This tutorial assumes that you are using the GNU bash shell, or something directly compatible. Users of other shells (especially csh and variants) may need to modify the examples.
Shell scripting techniques and usage varies a lot. Sometimes a script is only meant to be run by the system (e.g. as cron job), and other times scripts are really applications intended to be run by users. KDE includes features that allow you to use some KDE functionality from a shell script, which can save work, and can also make your script feel like it is part of a nicely integrated application set.
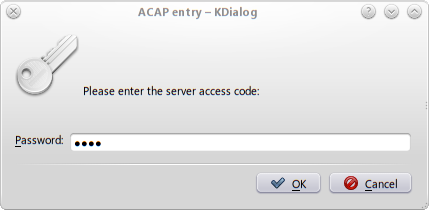
As an example, consider something like a password dialog. If you need a user to enter a password, you can easily generate a dialog from your script that looks like the following:
kdialog Usage
Example 1: Password Dialog
The key to using KDE dialogs in shell scripts is an application named kdialog. To generate a password dialog as shown in above, you could use the following command line.
kdialog --password "Please enter the server access code:"
Let's look at the code in a bit more detail. The arguments to kdialog are used to control the type of dialog that is produced and the parameter or parameters of that dialog box. In the case of the password dialog, you use --password to specify the dialog type, and then follow that with the parameter, which is the text that appears in the dialog box.
Example 2: Shell Script Return Values
Each time you run kdialog (or any other application), there is a return value that indicates whether the application ran as expected, or failed in some way. You can access this return value as $?, as shown in the following example.
[watson@bakerst]$ kdialog --password "Some Text"
hello
[watson@bakerst]$ echo $?
0
- Note - The $? variable is updated when each foreground process exits. If you need to use that variable later, you need to save it away.
In this example, the return value is zero. It would be one if the Cancel button had been selected instead of the OK button.
- Note - This is different to the convention used by the underlying widgets. If you are familiar with the underlying Qt widgets, this might be a bit confusing, however it is important to conform to the standard approach to shell scripting.
Example 3: Shell Script Return Value with Error
The convention is that negative numbers indicate failure, however the shell normally subtracts them from 256. This means that if you fail to specify a required argument, the system returns -2, and $? returns 254.
[watson@bakerst]$ kdialog --password
kdialog: '<text>' missing.
kdialog: Use --help to get a list of available command line options.
[watson@bakerst]$ echo $?
254
Example 4: Password Dialog, with Return Value Check
In a shell script, you might choose to test the return value after each invocation.
   kdialog --password "Please enter the server access code:"
   if [ $? = 0 ]; then
           echo " you selected: OK"
   else
           echo " you selected: Cancel"
   fi
In addition to the return value, you also get the password itself (assuming that you selected OK). After all, what is the point of a password dialog unless you can use the result?
Example 5: Password Dialog Showing Redirection
For the password dialog, and other kdialog dialogs that provide input capabilities, the output is sent to standard output. This allows you to redirect the input to a file, or pipe it to another program. In the case of the password dialog, the text that is entered will be echoed as shown in Example 2, unless you redirect it.
[watson@bakerst]$ kdialog --password "Enter the password" > password.file
[watson@bakerst]$ cat password.file
Secrter
Example 6: Password Dialog Using a Shell Variable
Instead of saving the result in a file, you can also use a shell variable. Note that you need to use the "backtick" notation - this key is normally found on the top left of English (British or American) layout keyboards, above the "7" key on French layout keyboards, and on the top right of German layout keyboards.
[watson@bakerst]$ password=`kdialog --password "Enter the password"`
[watson@bakerst]$ echo $password
Secreter
Example 7: Password Dialog with Title
While not shown in the previous examples, you can also use the --title option to specify the title of the dialog box, as shown in the following example.
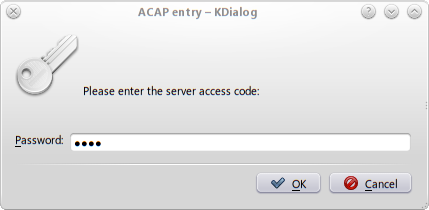
kdialog --title "ACAP entry" --password "Please enter the server access code:"
Which results in:
kdialog Dialog Types
The password dialog is just one of the many dialogs that kdialog can provide. This section provides an overview of each type, and describes the arguments you need to provide for each dialog type.
Basic message boxes
Basic message boxes are intended to provide status type information. There are variations to indicate the importance of the information (information, warnings, or errors). In each case, the argument is the text to provide, as shown in the following examples.
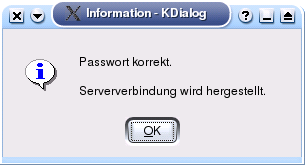
Example 8. Information level message box
kdialog --msgbox "Password correct.\n About to connect to server"
Figure 3. Information level message box screenshot
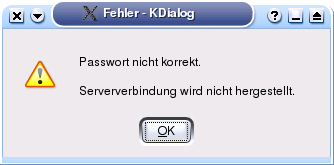
Example 9. Sorry level message box
kdialog --sorry "Password incorrect.\n Will not connect to server"
Figure 4. Sorry level message box screenshot
Example 10. Error level message box
kdialog --error "Server protocol error."
Figure 5. Error level message box screenshot
The return value for these basic message boxes is zero.
While not used in these examples, you can use the --title to set the window title as well. This option can be used with any of the dialog types.
You can also attach the dialog box to any window, including the current Konsole window. This can be done by, for example,
kdialog ${WINDOWID:+--attach $WINDOWID} --msgbox "I'm attached"
Non-Interrupting Notifications
kdialog supports the concept of a popup dialog that does not grab focus, called a passive popup.
--passivepopup takes a text label to display, and a timeout. The display will be automatically removed when the timeout (which is in seconds) has elapsed, or when the user clicks on the popup.
Example 11. --passivepopup dialog box
kdialog --title "This is a passive popup" --passivepopup \
"It will disappear in about 10 seconds" 10
Figure 6. --passivepopup dialog box screenshot
More Message Boxes
Sometimes you need more than the basic message box allows. Perhaps you have a potentially dangerous action, and you need to give the user a second chance. Or perhaps you just need a decision based on some information. kdialog provides some of the tools you might need.
A --yesno type dialog is probably the simplest of this type, as shown below. Like the simple message boxes previously, it requires a text string, which is shown in the message box.
Example 12. --yesno message box
kdialog --title "Example YesNo dialog" --yesno "System is not \
currently connected.\n Do you want to connect now?"
Figure 7. --yesno message box screenshot
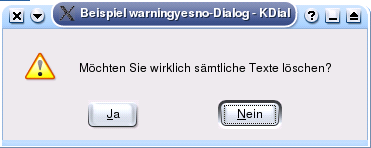
A variation on the --yesno dialog type is the --warningyesno, which modifies the dialog box appearance a bit.
Example 13. --warningyesno message box
kdialog --title "Example YesNo warning dialog" --warningyesno "Are \
you sure you want to delete all that hard work?"
Figure 8. --warningyesno warning screenshot
A further variation is to use a --warningcontinuecancel dialog type, which has the same usage, but has different button labels, and may fit some situations better.
Example 14. --warningcontinuecancel message box
kdialog --title "Example ContinueCancel warning dialog" \
--warningcontinuecancel "Are you sure you want to delete all that \
hard work?"
Figure 9. --warningcontinuecancel warning screenshot
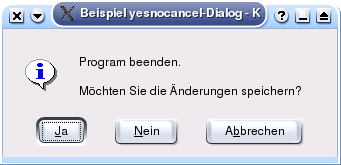
Another variation on the --yesno dialog type is to add a third option, as shown in the --yesnocancel dialog type.
Example 15. --yesnocancel message box
kdialog --title "YesNoCancel dialog" --yesnocancel "About to exit.\n \
Do you want to save the file first?"
Figure 10. --yesnocancel message box screenshot
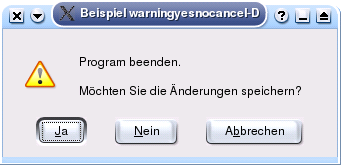
There is also a --warningyesnocancel variation, as shown below.
Example 16. --warningyesnocancel message box
kdialog --title "YesNoCancel warning dialog" --warningyesnocancel \
"About to exit.\n Do you want to save the file first?"
Figure 11. --warningyesnocancel message box screenshot
The return value ($?) from all these dialog boxes follows a common pattern. A Yes, OK or Continue returns 0. A No returns 1. A Cancel returns 2.
Suppressing the display of a dialog
Sometimes you will be using kdialog in a loop, or other situation where a message may be repeated. For example, you might be iterating through a list of files, and you raise an error for each file you cannot open because of permission problems. This can produce a really bad user experience because the error is repeated over and over.
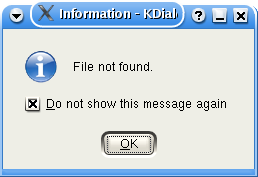
The normal KDE way to deal with this is to allow the user to suppress the display of a message in the future by selecting a checkbox, and kdialog allows you to do this with the --dontagain option. This option takes a file name and an entry name, and if the user selects the checkbox, then an entry is written to the specified file, with the specified entry name.
As an example, consider an information level message box for display of a file missing message.
Example 17. Information level message box, with --dontagain
kdialog --dontagain myscript:nofilemsg --msgbox "File not found."
Figure 12. Information level message box, with --dontagain, screenshot
As noted above, an entry is written to a file when the user selects the checkbox.
Example 18. --dontagain file listing
$ cat ~/.kde/share/config/myscript
[Notification Messages]
nofilemsg=false
The effect of this entry is to suppress future display of dialogs using that filename. In the example above, this means myscript:nofilemsg. This will take effect across all KDE applications, so be careful of the filename you use.
User Input dialogs
There are two basic free-form user input dialog types - the --inputbox type and the --password type. The password dialog was covered in depth in a previous section - see the Section called kdialog Usage.
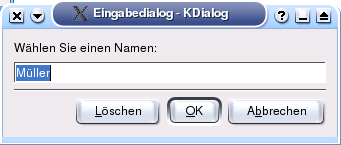
The --inputbox dialog type requires at least one parameter, which is used as the text in the dialog box.
Example 19. --inputbox dialog box
kdialog --title "Input dialog" --inputbox "What name would you like to
use"
Figure 13. --inputbox dialog box screenshot
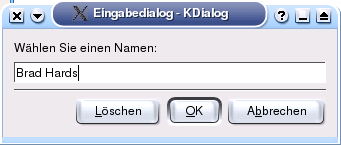
Sometimes you want to provide a default text string in the input dialog. You can do this by providing that string as the optional second parameter, as shown below:
Example 20. --inputbox dialog box with default parameter
kdialog --title "Input dialog" --inputbox "What name would you like to
use" "default Name"
Figure 14. --inputbox dialog box screenshot showing default text
The return value depends on the button used. OK returns 0. Cancel returns 1.
The string that is entered (or modified / accepted if default text is used) is returned on standard output. If the user chooses Cancel, no output is sent.
Displaying files
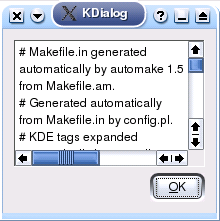
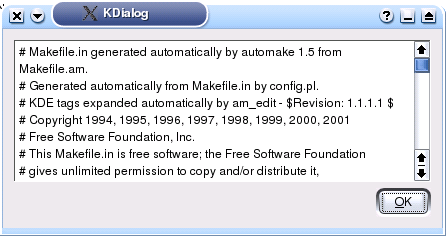
A common requirement for shell scripts is the ability to display a file. kdialog supports this with the --textbox dialog type. This dialog type has one mandatory parameter, which is the name of the file to be displayed. There are also two optional parameters which specify the width and height of the dialog box in pixels. If these are not specified, 100 pixels by 100 pixels is used.
Example 21. --textbox dialog box
kdialog --textbox Makefile
Figure 15. --textbox dialog box
Example 22. --textbox dialog box with dimensions
kdialog --textbox Makefile 440 200
Figure 16. --textbox dialog box with dimensions
Menu and Selection Dialogs
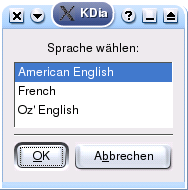
This section covers simple menus, checklists, radio buttons and combo-boxes. These are typically used for providing a choice of options. The menu is used to select one of a range of options. Each option is defined using two arguments, which you might like to think of as a key and a label. An example of the usage is shown below.
kdialog --menu "Select a language:" a "American English" b French d "Oz' English"
Figure 17. --menu dialog box
If you select the first option (in this case American English and press OK, then kdialog will send the associated key (in this case the letter a) to standard output. Note that the keys do not need to be lower case letters - you can equally use numbers, upper case letters, strings or the contents of shell variables.
As with the other examples we've seen, the return value depends on the button used. OK returns 0. Cancel returns 1.
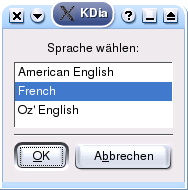
A checklist is similar to a menu, except that the user can select more than one option. In addition, a reasonable set of default selections can be provided. To do this, each option is defined using three arguments, which you might like to think of as a key, a label and a default state. An example of the usage is shown below.
Example 24. --checklist dialog box
kdialog --checklist "Select languages:" 1 "American English" off \
2 French on 3 "Oz' English" off
Figure 18. --checklist dialog box
Clearly the result can contain more than one string, since the user can select more than one label. By default, the results are returned on a single line, however you can use the --separate-output to get a carriage return between each result. These two cases are shown in the example below, where all of the options were selected in each case.
Example 25. --checklist dialog box
$ kdialog --checklist "Select languages:" 1 "American English" off \
2  French on 3 "Oz' English" off
"1" "2" "3"
$ kdialog --separate-output --checklist "Select languages:" \
1 "American English" off 2  French on 3 "Oz' English" off
1
2
3
As for the menu example, the return value depends on the button used. OK returns 0. Cancel returns 1.
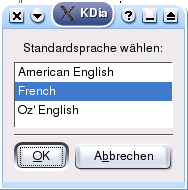
The radiolist is very similar to the checklist, except that the user can only select one of the options. An example is shown below:
Example 26. --radiolist dialog box
$ kdialog --radiolist "Select a default language:" 1 "American \
English" off  2  French on 3 "Oz' English" off
Figure 19. --radiolist dialog box
Note that if you try to turn on more than one option by default, only the last option turned on will be selected. If you don't turn on any of the options, and the user doesn't select any, kdialog will raise an assertion, so don't do this.
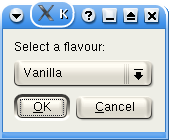
A combo-box is slightly different to the previous menu options, in that it doesn't use keys, but instead just returns the selected text. An example is shown below:
Example 27. --combobox dialog box
$ kdialog --combobox "Select a flavour:" "Vanilla" "Chocolate" "Strawberry" "Fudge"
Chocolate
Figure 20. --combobox dialog box
File Selection Dialogs
This section covers dialogs to select files to open and save. These dialogs access the power of the underlying KDE dialogs, including advanced filtering techniques and can provide either paths or URLs.
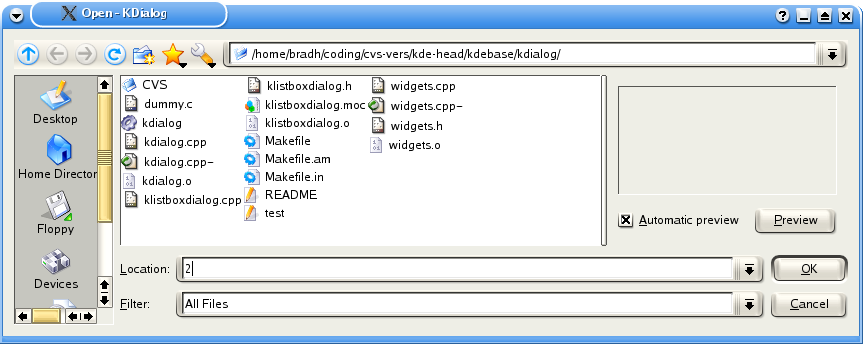
The dialog to select a file to open is invoked with --getopenfilename or --getopenurl. These two commands are used in the same way - only the format of the result changes, so every example shown here can be applied for either format. You have to specify a starting directory, and can optionally provide a filter. Here is a simple example that doesn't provide any filtering, and accesses the current directory:
Example 28. --getopenfilename dialog box
kdialog --getopenfilename .
Figure 21. --getopenfilename dialog box
As for previous examples, the return value depends on the button used. OK returns 0. Cancel returns 1.
As mentioned previously, the result format varies between the two variations. This is shown below, in each case selecting the same file:
Example 29. --getopenfilename dialog box
[watson@bakerst]$ kdialog --getopenfilename .
/home/watson/coding/cvs-vers/kde-head/kdebase/kdialog/Makefile.am
[watson@bakerst]$ kdialog --getopenurl .
file:/home/watson/coding/cvs-vers/kde-head/kdebase/kdialog/Makefile.am
Note that the user can only select an existing file with these options. When you doing a lot of opening of files, it can be useful to open the dialog in the directory that was navigated to last time. While you can potentially do this by extracting the directory from the filename, you can use a special KDE feature based on labels, as shown below:
Example 30. --getopenfilename dialog box with directory support
kdialog --getopenfilename :label1
kdialog --getopenfilename :label1
Each time you use the same label (with the colon notation), the last used directory will be used as the starting directory. This will normally improve the user experience. If that label hasn't been used before, the user's home directory will be used.
Note that the colon notation selects the last used directory for that label for the kdialog application. If you use two colons instead of one, the labeling scope becomes global and applies to all applications. This global scope is rarely what you want, and is mentioned only for completeness. Since not all files are applicable, it can be useful to restrict the files displayed. This is done using the optional filter argument. The best way to do this is with MIME types, as shown below:
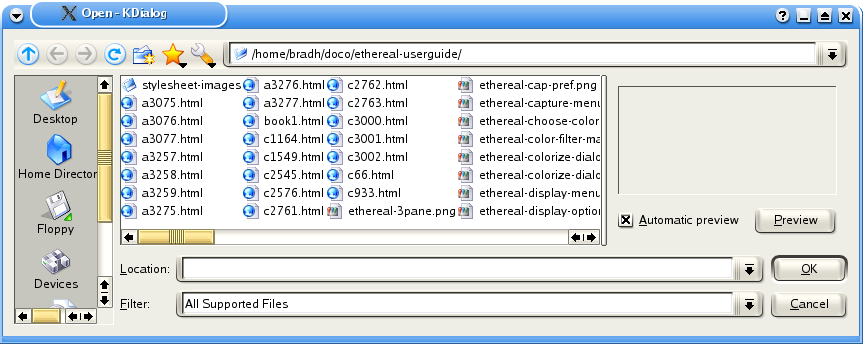
Example 31. --getopenfilename dialog box with MIME filter
kdialog --getopenfilename ~/doc/ethereal-userguide "image/png text/html text/plain"
Figure 22. --getopenfilename dialog box with MIME filter
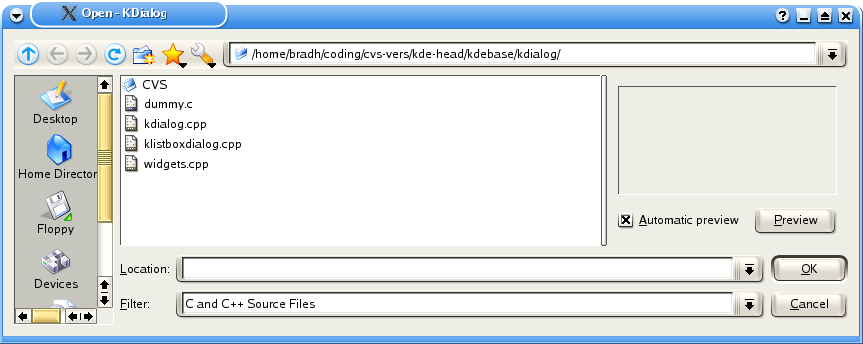
If it isn't possible to use MIME types, you can specify a range of wildcards and an optional label, as shown below:
Example 32. --getopenfilename dialog box with wildcard filter
kdialog --getopenfilename . "*.cpp *.cc *.c |C and C++ Source Files"
Figure 23. --getopenfilename dialog box with wildcard filter
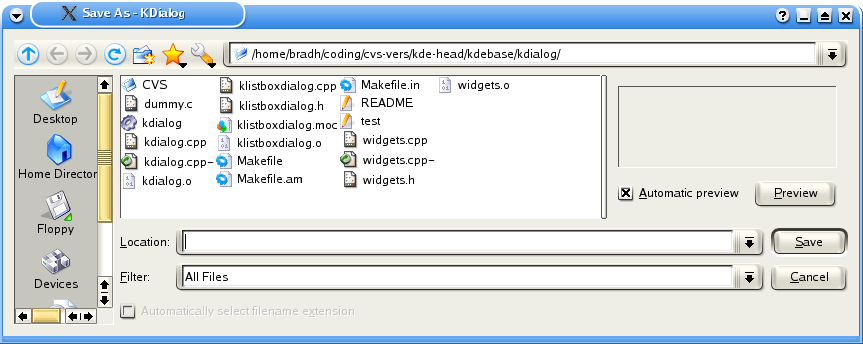
The --getsavefilename and --getsaveurl commands are directly analogous to the file opening dialogs. A simple example is shown below:
Example 33. --getsavefilename dialog box
kdialog --getsavefilename .
Figure 24. --getsavefilename dialog box
Unlike the file opening dialogs, the file saving dialogs allow to user to specify a filename that doesn't yet exist. As for the file opening dialogs, the file saving dialogs allow use of the colon notation, and also allow filtering using MIME types and wildcards, as shown below:
Example 34. --getsavefilename dialog box with filter
kdialog --getsavefilename :label1 "*.cpp *.cc *.c |C and C++ Source Files"
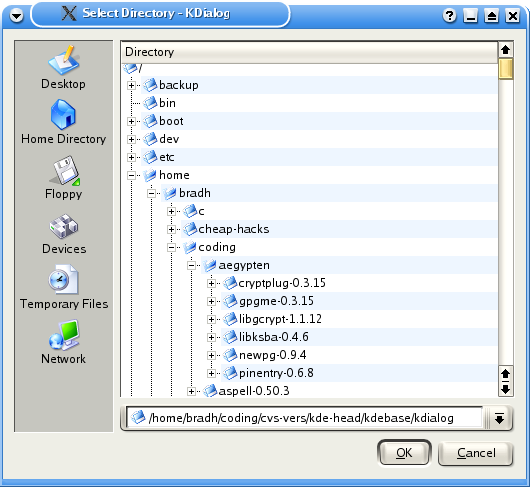
Sometimes you don't want to specify a filename, but instead need a directory. While you can specify a "inode/directory" filter to a file open dialog, it is sometimes better to use the --getexistingdirectory type, as shown below:
Example 35. --getexistingdirectory dialog box
kdialog --getexistingdirectory .
Figure 25. --getexistingdirectory dialog box
--getexistingdirectory does not provide any filtering, but it does provide the same starting directory options, including the colon notation.
Progress Dialogs
A progress bar dialog is a useful GUI element when you have a process that will take a long time, and you want to reassure the user that things are happening correctly, rather than having the user believe that the machine may have locked up. If you ever find yourself thinking about writing an information dialog that says something like "..., this may take a while", it may be appropriate to use a progress bar dialog.
Because you need to make the progress bar change, you can't use kdialog in the normal way. Instead, you set up the dialog, and use the dcop to make the required changes.
A simple use of the --progressbar command is shown below. Because it is fairly long, I've numbered the lines. The numbers aren't part of the script you would type in - they are purely for reference in the explanation.
Example 36. --progressbar dialog box example
1 dcopRef=`kdialog --progressbar "Initialising" 4`
2   dcop $dcopRef setProgress 1
3   dcop $dcopRef setLabel "Thinking really hard"
4   sleep 2
5   dcop $dcopRef setProgress 2
6   sleep 2
7   dcop $dcopRef setLabel "Thinking some more"
8   dcop $dcopRef setProgress 3
9   sleep 2
10  dcop $dcopRef setProgress 4
11  sleep 2
12  dcop $dcopRef close
Line 1 runs kdialog, with an initial label of Initialising, and a progress bar with four elements. We capture the return value in a variable (which can be named just about anything - I chose dcopRef) for later use with the dcop command. Line 2 sets the bar to one stage along, and line 3 changes the label to Thinking really hard. Line 4 is just a delay (which would be when your script would perform the first part of the lengthy task in a real application). Line 5 then increases the progress bar, followed by another delay (representing more processing) in line 6. Line 7 changes the label, while lines 8 through 11 further increase the progress bar over a few seconds. Line 12 closes the progress bar dialog - without this, it will remain displayed. If you'd prefer that the progress bar dialog closed as soon as the bar gets to 100%, you can use the setAutoClose true argument to dcop. If a task is taking a very long time, the user may decide that it is better cancelled. kdialog can assist with this too, as shown in the example below.
Example 37. --progressbar dialog box example, with Cancel
1 dcopRef=`kdialog --progressbar "Press Cancel at Any time" 10`
2  dcop $dcopRef showCancelButton true
3  until test "true" = `dcop $dcopRef wasCancelled`; do
4   sleep 1
5   inc=$((`dcop $dcopRef progress` + 1))
6   dcop $dcopRef setProgress $inc;
7  done
8 dcop $dcopRef close
As in the previous example, the first line executes kdialog with some initial text, this time with 10 segments; and again we capture the return value in a variable for later use with dcop. Line 2 turns on the display of the Cancel button, which is off by default.
Lines 3 through 7 are a loop. Line three runs dcop to check if the Cancel button has been pressed, and if it hasn't been pressed yet, runs line 4 through 6. Line 4 is again a delay, representing processing in a real application. Line 5 runs dcop to get the current progress bar setting, and adds one to the count (I could have just kept a counter variable, but this approach shows another dcop usage). Line 6 then sets the progress bar to the incremented value. Line 8 closes the progress bar dialog if the Cancel button has been pressed.
Copyright and License
This document is Copyright Brad Hards, 2003, 2004.
This documentation is licensed under the terms of the GNU Free Documentation License Version 1.1, with no Invariant Sections and no Cover Texts.

