Työkalupakki

Muotoile tekstiäsi
Käytä otsakkeita
Otsakkeet muokkaavat automaattisesti taulukkosisältöjen osan, joten niiden on oltava rakenteisia. Niiden paikkaa puussa hallitaan useilla '=' -merkeillä otsakkeen molemmissa päissä. Vältä yksittäisen '=' -merkin käyttämistä - se ilmoittaa sivuotsaketta ja pitäisi käyttää automaattista sivuotsaketta. Pääotsakkeesi käyttävät '== teksti menee tähän ==', seuraavalla tasolla, '=== lisää tekstiä ===' ja niin edelleen.
Käytälihavoitu jakursivoitu
Yhden merkin lainausmerkkejä käytetään määrittämään lihavoituja ja kursivoituja sanoja.
Käytä '''lihavoitu teksti''' määrittämään lihavoidun tekstin ja ''kursivoitu teksti'' määrittämään kursivoidun tekstin.
Sen takaamiseksi, että saamme helppoja ja tarkkoja kotoistamisia noudata typograafisia ohjeita.
Lisää koodipätkä
Meillä on mallinteita avustamaan koodipätkien näyttämisessä oikein. Käytön esimerkit eri tilanteissa ovat käytettävissä kohteessa typograafinen ohjesivu. Koodi eri laatikkomallinteisiin voidaan ottaa kohteesta tämä sivu.
Jos sinulla on vaikeuksia putkimerkkien näyttämisessä koodipätkässäsi, katso selitys ja yksityiskohtainen merkintäkieli kohteessa [[Special:myLanguage/Typographical_Guidelines|Typograafisia ohjeita]
Lisää sisennykset
- ":" käytetään sisennyksenä, ja sitä käytettiin useita kertoja joillakin vanhoilla sivuilla. Tämä on vanhentunut, ja aiheuttaa joitakin pulmia, joten monikerrat tulee poistaa löydettäessä. Yksittäinen ":"-merkki sisentää neljällä merkillä.
Muotoile päivämäärät
Päivämäärät ovat puhtaasti numeerinen muoto, joka aiheuttaa hämmennystä johtuen maantieteellisten vyöhykkeiden odotusten erosta. Muotoile päivämäärät
{{{1}}}kuukaudella joko kokonaan kirjoitettuna tai lyhennetyssä muodossa ja vuosi neljänumeroisessa muodossa. Päivä voi olla yksinumeroinen tai kaksinumeroinen.
Luetelmamerkkiluettelot
* on luetelmamerkkiluetteloissa käytetty symboli. ** antaa toisen tason:
{{{1}}}
tuottavat
- Manteleita
- Pähkinöitä
- Munuaispuun pähkinöitä
- Rusinoita
Luettelomerkit
Luettelomerkit tuotetaan samalla tavalla käyttäen merkkiä '#'.
{{{1}}}
tuottaa
- Siivilöi
- Sekoitus
- Sekoita perusteellisesti
- Leivo
Luettelomerkkiluetteloiden ja luettelomerkkien yhdistäminen
Sinulla voi olla luettelomerkkialiluettelo luettelomerkillisessä luettelossa ja päinvastoin, kuten tässä:
{{{1}}}
tuottaa
- Pähkinät
- Munuaispuun pähkinät
- Hullu
- Muita asioita
samalla kun
{{{1}}}
tuottaa
- Pähkinät
- Munuaispuun pähkinät
- Hullu
- Muut asiat


Alkiointi
Alkioinnit tuotetaan käyttämällä vaihtoehtoisesti ;- ja :-merkkejä. Ne soveltuvat parhaiten antamaan lyhyen kuvauksen sukulaisobjektien ryhmästä.
{{{1}}}
produces
- Animals
- They move around and devour other creatures.
- Plants
- They have roots and feed upon ground water and sun.

Add a Link
There are two kinds of links to learn, internal ones, to another TechBase page, and external URL links.
For an internal link the format [[Typographical_Guidelines]], where you want to display the name of the page, does work, but it is not ideal, particularly for translation to docbook and for localisation. It is better to use the form [[Special:myLanguage/Typographical_Guidelines|Typographical Guidelines]], because that allows translators to link correctly even though the page name is localised. The result is that it directs to the correctly translated page, if one exists. You often need to include the link in a sentence, so in that case you would use
[[Special:myLanguage/Typographical_Guidelines|this page]]
which displays
External links are slightly different so
[http://techbase.kde.org/Schedules our road map]
displays
our road map, which would take you straight to the techbase page.
One last thing to note - when you preview your page, all links are live. This gives you two benefits. You can check (by hovering) that your links are set up as you expected, and you can use a red link to create a new page.
Illustrate Your Text
Add a single image, centered
[[Image:KMail-kde4.png|250px|center]]
Note that you can change the position of the image, but the default is left. The size of the image depends on the circumstances, but for screenshots I recommend no less than 250px and no more than 500px.
Make the Image Clickable, and Add a Caption
Where you need to show more detail, create a moderately sized image, clickable, so that the full-size can be seen. Simply add the parameter '|thumb' within the image parentheses.
A caption can also be added as a parameter, but will only show if '|thumb' is present.
Use Tables to Precisely Place Multiple Images
{|class="tablecenter" style="border: 1px solid grey;"
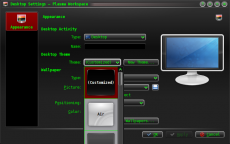
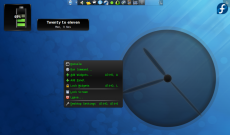
|[[Image:Desktop-config-customized.png|230px|center]]||[[Image:Desktop-settings-rightclick.png|230px|center]]
|-
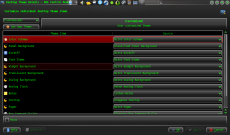
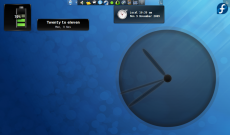
|[[Image:Desktop-theme-details-dialog.png|230px|center]]||[[Image:Plasma-multiple-themes.png|230px|center]]
|}
displays
 |
 |
 |
 |
Note that all the parameters for one image are contained within [[...]], and cells are separated by '||'. To start a new line, insert '|-' on an otherwise-empty line, then '|' at the start of the next one.
Add Notes and Warnings
Where a note or warning is relevant within your text, use these templates:
{{Info|This is general information}} displays

{{Note|Some important information at this point}} displays

{{Tip|A helpful piece of advice, something to remember}}displays

{{Warning|Take care - this is a dangerous thing to do}} displays

Where the strongest possible warning is needed, the Remember box can be used, but please use sparingly.
{{Remember|1=This is for things that definitely must not be forgotten}}

| Remember |
|---|
| This is for things that definitely must not be forgotten |
You can also change the heading:

| Remember |
|---|
You can use parameter number 3 to set an individual box heading:
{{Remember|3=Don't Forget This!|1=You can use...}} |
Other Useful Templates
Inserting GUI Icons
The best way to refer to icons in the GUI is to display it in the text. This can be done with a template like this: {{Icon|list-add}}. This will display the ![]() icon.
icon.
For this to work, the icon image must have been uploaded to the wiki. See Update an Image for an explanation on how to upload images. The .png files can usually be found here: usr/share/icons/oxygen. If possible use the 16x16 icon. The file name should have an Icon- prefix as in Icon-list-add.png — apart from the prefix the filename should exactly match the usual name. Note, that when using the template you should neither write the Icon- prefix nor the .png file type extension.
The ![]() icon can also be written as
icon can also be written as {{Plus}}, and the ![]() icon as
icon as {{Minus}}. You can also use {{Configure}} to get the
![]() icon, and
icon, and {{Exit}} gets you the
![]() icon.
icon.
Making Major Edits to Existing Pages
If a page is likely to be open for editing for some time there is a danger of conflicts - someone else may edit at the same time, and saving your edit will cancel out theirs, or vice versa. The way to avoid that is to make a temporary entry, directly under the language bar, using {{Being_Edited}} which will display

| Currently Being Edited |
|---|
| This page is currently being edited. If this notice persists for an unreasonable time, please either notify irc.freenode.org #kde-www or report on Annewilson's Talk page. |
Don't forget to remove it when you have finished!
Adding a New Complex Page
If you need to be able to work on a page for quite some time, over several days, for instance, you may like to use the Construction template - {{Construction}}, which displays
Adding a List of Sub-Pages
== Subpages of {{FULLPAGENAME}} ==
{{Special:PrefixIndex/{{FULLPAGENAME}}/}}
is very useful when you want to list subpages with active links, such as
Subpages of Toolbox/fi
It does, however, also list all "other-language" pages, so use with discretion.

