Development/Tutorials/Plasma4/Python/Using widgets
Abstract
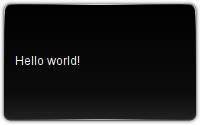
Using paintInterface to display applets is powerful, and sometimes even necessary (when you want to display SVG graphics, for example). It is not the only method available to create a Plasmoid, however. Plasma comes with a number of widgets "tailored" for using in Plasmoids. This tutorial will create a very simple "Hello, world!" Plasmoid using this approach.
Prerequisites
Set up your applet directory and create a metadata.desktop file as described in the main tutorial.
The 'main.py' file
Here's how our main.py file will look like:
- Copyright stuff
from PyQt4.QtCore import *
from PyQt4.QtGui import *
from PyKDE4.plasma import Plasma
from PyKDE4 import plasmascript
class HelloWorldApplet(plasmascript.Applet):
   def __init__(self,parent,args=None):

       plasmascript.Applet.__init__(self,parent)
def init(self):
       self.setHasConfigurationInterface(False)
       self.setAspectRatioMode(Plasma.Square)
       self.theme = Plasma.Svg(self)
       self.theme.setImagePath("widgets/background")
       self.setBackgroundHints(Plasma.Applet.DefaultBackground)
       self.layout = QGraphicsLinearLayout(Qt.Horizontal, self.applet)
       label = Plasma.Label(self.applet)
       label.setText("Hello world!")
       self.layout.addItem(label)
       self.resize(125,125)
def CreateApplet(parent):
return HelloWorldApplet(parent)
Let's take a deeper look at it. As in the main tutorial, we create our class by deriving from plasmascript.Applet. In __init__, we initialize the class. In init() instead, we do all the dirty work of creating the applet and adding the text to it.
First of all, we tell Plasma that this applet has not a way to be configured (self.setHasConfigurationInterface(False)). We then set its aspect ratio mode, which is used with regards of resizing, and we set it to square (Plasma.Square). Then, we start adding a background to the applet, using the SVGs provided normally by the Plasma theme. We do so by creating an instance of Plasma.Svg, which we assign to self.theme, and then we set the SVGs that we will use via self.setImagePath. Written like that, it means that the applet will use the standard "background" SVG provided inside the "widgets" directory of our current Plasma theme. We can also use relative paths or absolute paths to SVGs of our choice, should we need them. The setBackgroundHints sets the Plasmoid's background using the default Plasma background (Plasma.Applet.DefaultBackground), saving us the time and the effort to do it ourselves.
The third and most important steps deals with creating a layout. It is a bit special, as compared to the standard QLinearLayout seen in Qt (and PyQt), because it is done inside a QGraphicsView, used by Plasma. We want a simple, linear layout, and so we use a QGraphicsLinearLayout.
Then, we create a label, a Plasma.Label to be precise. This is a widget that is Plasma-aware, as we have said, and so makes use of all the goodies provided by Plasma (for example, changing text color if we change Plasma theme). We use then the setText method (analogous to the setText method of a normal QLabel) to set our text ("Hello, world!") to the label, and we add it to the layout. Finally, we resize the applet to 125 x 125 pixels.
Once packaged and installed (see the main tutorial), the Plasmoid will look like this:

Conclusion
This brief tutorial shows how to use Plasma widgets with your applet. Aside Plasma.Label, there are many more widgets you can use.
