Development/Tutorials/Using KXmlGuiWindow: Difference between revisions
| Line 67: | Line 67: | ||
==Back to main.cpp== | ==Back to main.cpp== | ||
为了能够实际运行前面定义的窗口, 我们还需要在<tt>main.cpp</tt>中增加一些代码: | |||
===main.cpp=== | ===main.cpp=== | ||
<code cppqt> | <code cppqt> | ||
| Line 93: | Line 93: | ||
} | } | ||
</code> | </code> | ||
与第一讲相比,这里唯一新增加的行就是第18和19行。在第18行,我们生成了一个MainWindow类的对象实例,然后在第19行显示它。 | |||
==CMake== | ==CMake== | ||
Revision as of 05:29, 25 September 2007
Template:I18n/Language Navigation Bar (zh CN)
| Tutorial Series | 初学者教程 |
| Previous | 教程1 - Hello World |
| What's Next | 教程3 - 使用KActions |
| Further Reading | KXmlGuiWindow |
摘要
本教程承接上一讲教程1 - Hello World ,进一步介绍KXmlGuiWindow类的使用。
在上一讲中,程序只是显示了一个弹出框。在本讲中,我们要让我们的程序具备更加实际功能。

使用KXmlGuiWindow
为了得到一个可用的KXmlGuiWindow,我们必须对它子类化。为此,我们创建两个文件:mainwindow.cpp和mainwindow.h,在其中保存我们的派生类代码。我们的类继承自KXmlGuiWindow,因为它使用XML来定义程序的菜单结构。
mainwindow.h
- ifndef MAINWINDOW_H
- define MAINWINDOW_H
- include <KXmlGuiWindow>
- include <KTextEdit>
class MainWindow : public KXmlGuiWindow
{
 public:
   MainWindow(QWidget *parent=0);
 private:
   KTextEdit* textArea;
};
- endif
首先,我们在第7行声明了KXmlGuiWindow的一个派生类:class MainWindow : public KXmlGuiWindow.
接下来我们声明了一个构造函数MainWindow(QWidget *parent=0);.
最后我们定义了一个指针类型的成员变量,它将被用来指向我们用来构成程序主体的KTextEdit对象。KTextEdit是一个通用的RichText编辑器,并具有很多KDE特有的优点,如光标自动隐藏等。
mainwindow.cpp
- include "mainwindow.h"
MainWindow::MainWindow(QWidget *parent) : KXmlGuiWindow(parent)
{
 textArea = new KTextEdit;
 setCentralWidget(textArea);
 setupGUI();
}
首先,很自然的,我们在第一行首先声明包含了含有类声明的头文件。
在第五行,我们初始化了一个KTextEdit对象并将它赋给之前定义的成员变量。接下来在第6行,我们调用KXmlGuiWindow内置的setCentralWidget()函数,它告诉程序应该将什么东西显示在窗口的中央。
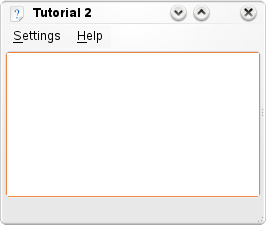
最终, KXmlGuiWindow::setupGUI()被调用,它会替我们完成很多底层的工作,并创建一个缺省的菜单(包含“设置”和“帮助”)。
Back to main.cpp
为了能够实际运行前面定义的窗口, 我们还需要在main.cpp中增加一些代码:
main.cpp
- include <KApplication>
- include <KAboutData>
- include <KCmdLineArgs>
- include "mainwindow.h"
int main (int argc, char *argv[])
{
 KAboutData aboutData( "tutorial2", 0,
     ki18n("Tutorial 2"), "1.0",
     ki18n("A simple text area"),
     KAboutData::License_GPL,
     ki18n("Copyright (c) 2007 Developer") );
 KCmdLineArgs::init( argc, argv, &aboutData );

 KApplication app;

 MainWindow* window = new MainWindow();
 window->show();
return app.exec();
}
与第一讲相比,这里唯一新增加的行就是第18和19行。在第18行,我们生成了一个MainWindow类的对象实例,然后在第19行显示它。
CMake
The best way to build the program is to use CMake. All that's changed since tutorial 1 is that mainwindow.cpp has been added to the sources list and any tutorial1 has become tutorial2.
CMakeLists.txt
project (tutorial2)
find_package(KDE4 REQUIRED)
include_directories( ${KDE4_INCLUDES} )
set(tutorial2_SRCS
	main.cpp
	mainwindow.cpp
)
kde4_add_executable(tutorial2 ${tutorial2_SRCS})
target_link_libraries( tutorial2 ${KDE4_KDEUI_LIBS})
编译运行
To compile, link and run it, use:
cmake . && make && ./tutorial2
继续前进
Now you can move on to using KActions.
