Marble/OSMSlippyMaps: Difference between revisions
Tackat phab (talk | contribs) |
Tackat phab (talk | contribs) |
||
| Line 19: | Line 19: | ||
* Each zoom level is a directory, each column is a subdirectory, and each tile in that column is a file | * Each zoom level is a directory, each column is a subdirectory, and each tile in that column is a file | ||
* Filename(url) format is /zoom/x/y.png | * Filename(url) format is /zoom/x/y.png | ||
With some modifications our tutorial can also be applied to [https://gitlab.com/groups/marble-restricted-maps other tile servers]. | With some modifications our tutorial can also be applied to [https://gitlab.com/groups/marble-restricted-maps other tile servers]. | ||
Revision as of 16:34, 3 April 2016
How to create map themes based on OSM slippy maps
Introduction: Capabilities, Limitations
This tutorial describes the steps that we recommend to create a new Marble map theme based on OSM slippy maps. Examples for these kind of maps include:
The map data of these maps is located on dedicated servers and is usually created from OSM data. Technically the map data adheres to the following standard:
- Tiles are 256 × 256 pixel PNG files
- Each zoom level is a directory, each column is a subdirectory, and each tile in that column is a file
- Filename(url) format is /zoom/x/y.png
With some modifications our tutorial can also be applied to other tile servers.
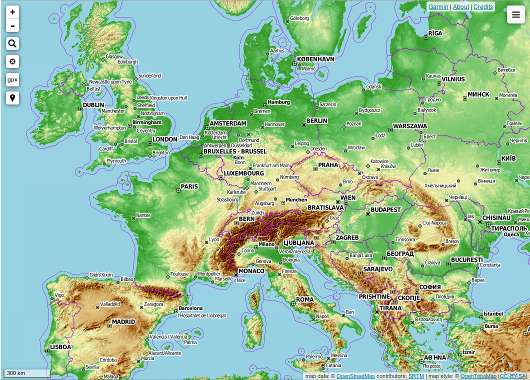
In this tutorial we are going to create a new theme based on the Slippy Map from the OpenTopoMap website.
Creating a new map theme for Marble is simple. For a quick creation of a simple Map theme we even offer a Map Theme Creation Wizard
However in this tutorial we'd like to walk you through the creation of a map theme using a text editor. This allows for much more flexibility, better integration of different data layers and more customization.
First Steps
We start off by creating a new directory below
~/.local/share/marble/maps/earth
(for Windows users: c:\users\%username%\local\.marble\data\maps\earth )
The name of the directory needs to be chosen with care: Each map theme is referenced via a map theme identifier. This map theme id is used throughout the Marble application to identify the map theme. The map theme id needs to be lower case and must not contain any spaces. And our directory name represents that map theme id. So as a reference please check the existing directory names to be consistent with other map themes. I chose "opentopomap" as a map theme id and therefore created a new directory "opentopomap":
mkdir opentopomap
So we now enter that directory and unzip the file File:Osmstylemarbletheme.zip
After that we rename the uncompressed files
mv openstreetmap.dgml opentopomap.dgml
mv openstreetmap-preview.png opentopomap-preview.png
Now we need to open "opentopomap.dgml" in a text editor. In this tutorial we're using the Kate editor (or kwrite) as an example but of course you can also do it inside in any text editor of your choice (e.g. Qt Creator, vi, emacs or Notepad).
Adjusting the general information
After loading "opentopomap.dgml" into the text editor you can see that the dgml file resembles a human readable XML file. Note that all file paths that are provided in the dgml are case sensitive.
In line 15 you can see how the map theme id is specified as:
<theme>openstreetmap</theme>
We want to replace all references to this map theme id by our new map theme id "opentopomap". So I press Ctrl+R and replace all occurances of "openstreetmap" with "opentopomap" in the opentopomap.dgml file. If you're using a different text editor make sure that the search/replace operation is case-sensitive. Next I adjust the map theme name that will later on appear in Marble's Map View panel. You can find it in line 13:
<name>OpenTopoMap</name>
After these important steps I adjust the license in line 12.
<license short="© OpenStreetMap / OpenTopoMap contributors">Map data: © OpenStreetMap contributors, SRTM. Map style: © OpenTopoMap, License: Creative Commons Attribution-ShareAlike 2.0 (CC BY-SA)</license>
The attribute short holds the short license reference that is printed in the bottom right corner of the Marble map canvas. The text in between the license tags provides the full license information.
I also adjust the description in line 18 of the opentopomap.dgml file. For the description it's possible to use HTML - but note that this requires the usage of <![CDATA[ ]]> tags!
<description><![CDATA[<p><i>OpenTopoMap</i> is a free topographic map which has been created from OpenStreetMap and SRTM data. The map style is inspired by official maps and focuses on legibility through high contrast and balanced signatures.</p>]]></description>The minimum and maximum zoom values specified in line 19-23 allows the map theme creator to limit the zoom range. The discrete boolean is only supported by recent Marble versions. It controls whether zooming is supposed to snap towards the zoom value that delivers the sharpest text rendering (note that best results are achieved in Mercator projection).
Creating the map layers
In the next step we'd like to define the texture layers that are used in our map theme. Marble can combine several different thematic layers of texture data. Our base layer is defined in line 31-41.
<texture name="opentopomap_data" expire="604800">
    <sourcedir format="PNG"> earth/opentopomap </sourcedir>
    <tileSize width="256" height="256"/>
    <storageLayout levelZeroColumns="1" levelZeroRows="1" maximumTileLevel="19" mode="OpenStreetMap"/>
    <projection name="Mercator"/>
    <downloadUrl protocol="http" host="a.tile.opentopomap.org" path="/"/>
    <downloadUrl protocol="http" host="b.tile.opentopomap.org" path="/"/>
    <downloadUrl protocol="http" host="c.tile.opentopomap.org" path="/"/>
    <downloadPolicy usage="Browse" maximumConnections="20"/>
    <downloadPolicy usage="Bulk" maximumConnections="2"/>
</texture>
The name attribute of the texture tag specifies the texture id that can be used to reference the data in other places.
The expire attribute defines the amount of time in seconds after which a downloaded tile will get automatically reloaded. In our case this value amounts to 604800 seconds which equals 7 days. So once a certain tile has been downloaded from the tile server it will take at least 7 days until that certain tile expires. Only then Marble checks the server again for a possible new update to that specific tile. This means that different tiles get updated at different times and hence tile updates will happen smoothly and distributed over time.
The tileSize, storageLayout and projection are specific to It OpenStreetMap directory layouts on the server. This type of layout is typical for all tiles that are based on OpenStreetMap data. For data that has got a different tile size or a different layout you need to make adjustments where needed. The downloadUrl allows you to specify different servers where the texture tiles can be pulled from. Marble will distribute the download to those servers and will limit the maximum amount of parallel download connections according to the downloadPolicy. The normal usage is Browse while Bulk is only used in the Marble application once you pre-download whole regions of data via .
Be aware that the downloadUrl protocol in this particular case is "http". Many servers out there don't support the secure https protocol - so it's a good choice to just choose "http" for a start. Also note that you might need to adjust the downloadUrl path using placeholders such as {x}, {y}, {zoomLevel}. By default in OpenStreetMap storageLayout mode Marble assumes that {x}, {y} and {zoomLevel} are accessed via the path extension "/{zoomLevel}/{x}/{y}.png".
Right below the "opentopomap_data" texture layer you can see the "hillshading" layer in line 42-51. This additional layer is specified in the same way as the opentopomap_data layer. However there is one small difference: The hillshading texture layer features a "blending" tag that allows for specifying a filter algorithm for blending the layer on top of the (opentopomap_data) layer underneath. Marble supports more than 30 different blending types - one of them is AlphaBlending.
The hillshading layer however is not visible by default in Marble. It can be enabled by the user via a checkbox in the legend tab. In our opentopomap map theme we don't need a second texture layer yet, so we delete the hillshading texture layer in lines 42-51.
Below the texture layers you can find other layers which contain geodata elements. Those elements hold additional data that can be loaded from other file formats (such as KML, GPX, SHP or OSM). This data is displayed on top of the texture layers.
Before we can test the basic featureset of our new map theme we need to download the levelzero base tile 0.png for our map and store it inside the map themes' 0/0 directory.
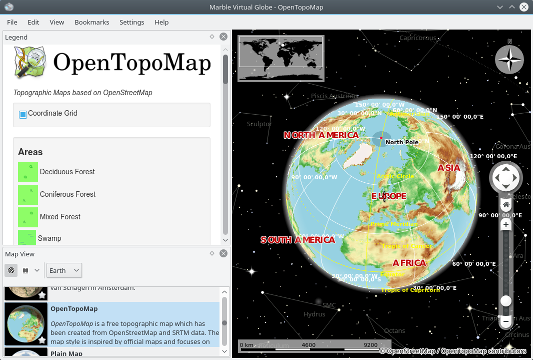
Once this is done you can start Marble and check whether the map theme gets properly displayed. For debugging you can use the --debug-info application parameter:
marble --debug-infoBuilding an interactive Legend
The opentopmap.dgml also allows for creation of matching content inside the tab. The legend is very flexible and provides unique features:
- the user can create map key items for each feature visible on the map
- the user can fully design the legend content and apply styling using HTML and CSS (since the legend is a webkit browser)
- custom checkboxes and radiobuttons can be added to the legend that control the appearance of the map theme's texture layers and data in Marble.
In order to create entries in the legend tab we search for the <legend> tag inside the dgml-file. The legend contains several sections. The first section "Tours" contains a link to a KML tour object that runs a demo when clicked. Since we haven't created such a demo kml tour yet we can delete this first tour section. The "coordinate-grid" section also contains interesting stuff: This entry provides the text "Coordinate Grid". The attribute "checkable=true" indicates that a checkbox is provided in front of the text. This checkbox controls the property "coordinate-grid" which is defined in the Settings tag earlier in the dgml file (and which has the default value "true" assigned). Note that in order to control a property from a checkbox the section's "connectTo" attribute has to be assigned to a property id that is defined in the Settings tag. The spacing attribute indicates the spacing in pixels to the left of the text.
We keep the coordinate-grid entries and we look for the next section: "Hillshading". The hillshading entry would control the appearance of the hillshading layer via the hillshading property and the connectTo attribute. However we had deleted that layer already. Therefore we also remove the "TextureLayers" property group that includes the hillshading property. And we also remove the "hillshading" section inside the Legend tag.
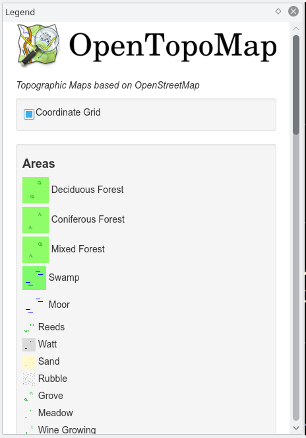
Now we can start to add our custom legend entries: We create a new (uncheckable) section and associate the heading "Terrains" with it. Then we add items. The OpenTopoMap website has a nice map at key http://opentopomap.org/about . We save the images on that website using the context menu into a legend subdirectory inside our opentopomap directory. Then we replicate the opentopomap map key by adding further items:
     <section name="areas" checkable="false" spacing="12">
        <heading>Areas</heading>
        <item name="deciduous_forest">
          <icon pixmap="maps/earth/opentopomap/legend/laubwald.png"/>
          <text>Deciduous Forest</text>
        </item>
        <item name="conferous_forest">
          <icon pixmap="maps/earth/opentopomap/legend/nadelwald.png"/>
          <text>Coniferous Forest</text>
        </item>
        <item name="mixed_forest">
          <icon pixmap="maps/earth/opentopomap/legend/mischwald.png"/>
          <text>Mixed Forest</text>
        </item>
In this case we used the pixmap attribute inside the icon tag. Alternatively it's also possible to create a rectangular bullet by using the color attribute instead (e.g. <icon color="#aed1a0"/> ). We can continue to add add as many sections and items as we want.
Styling the Legend
Next we can make changes to the legend.html
This file allows for easy addition of more text, illustrations and styling via HTML and CSS. Once you open the legend.html file in a text editor please look for this very important comment:
<!-- ##customLegendEntries:all## -->This particular comment marks the place where the legend items from the DGML file are automatically inserted. So you should not remove this line - since removing this line will prevent that the legend items are displayed. Feel free however to add HTML and CSS tags above and below this text.
Creating an icon for the map theme
In Marble we use a standard template image as a base for all map theme icons. This template image consists of a black square with a drop shadow.
On top of this template we copy the globe displaying the map theme. In order to prepare for creating this icon we launch Marble and apply the following steps:
- Turn off the Crosshairs via
- Turn off the Atmosphere via
- Turn off the Stars via
- Turn off the Coordinate Grid via
- Turn off the placemark labels - this might require setting the place related properties (e.g. cities) inside the dgml file to false.
- Turn on sunshading via
- Search for "Flensburg" in the Search field and select Flensburg in Germany. This should center on Flensburg.
- Maximize the Marble application window
Now that you have completed these steps please launch the Gimp application.
- Create a screenshot via . Increase the Delay to 10 secs in the popup. Then bring the Marble window to the front. Click onto the Marble Window once the mouse cursor changes into a cross symbol.
- Bring up the Toolbox via . Then choose the icon. Drag the crop tool frame around the globe so that it resembles a square. The square should fit around the globe so that it still leaves a small black margin visible around it. Once the square is properly positioned click inside the square to perform the actual cropping
- Scale the resulting image to about 125x125 by entering menuchoice>Image->Scale Image</menuchoice>
- Use the Magic Wand / in the toolbox to select the black area
- Invert the selection via .
- Copy the selection via
- Open the opentopomap-preview.png file via .
- Copy the selection via
- Center the globe selection in the black square
- Use to save the new preview icon.
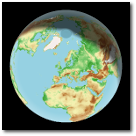
The result should look like this:
Packaging and Deployment
In order to create a package of your new map theme we suggest that you create a zip file. During testing Marble might have downloaded additional tiles so we suggest that before you start to package your map theme you once again enter the map theme directory and remove all numbered directories (1, 2, 3, 4, ...) except for the level zero directory "0". Once this is done you can enter ~/.local/share/marble/maps and execute
zip -r opentopomap-marblemap.zip earth/opentopomap/*For proper packaging it's important that the directory structure is included starting from "earth".
If you want to share your newly created map theme with other Marble users we suggest that you send it to the Marble team. We will then upload it to the map theme server.
In fact we've done this with the OpenTopoMap that we created in this tutorial:
You can download the latest version either via or from


