Projects/Usability/HIG/UI Files
The aim of this tutorial is to explain how to create and modify screenshots for the KDE Human Interface Guidelines.
UI Files
UI files are used by Qt Designer and Qt Creator for designing User Interfaces. If you want to modify them, you should use Qt Designer, but this is off topic and I link some tutorials for you:
And a very very good video-tutorial for Python:
How to compile UI files
In order to use your interfaces, you have to compile these files into a Python or C++ application. For this tutorial I have chosen Python.
Obviously, you need Python. On KUbuntu, it can be installed with this command (in your terminal):
$ sudo apt-get install python2.6
You have to compile your .ui files with the pyuic4 tool. Make sure you have the pyqt4-dev-tools package installed. On KUbuntu, just open the terminal and type:
$ sudo apt-get install pyqt4-dev-tools
This will check if the package is installed. If not it will installed automatically.
Now you can compile the .ui file into a Python file! Simply run the following command:
$ pyuic4 -x -o output.py input.ui
Notes:
- -x tells pyuic4 to generate extra code to directly test and display the GUI
- -o sets the output file
To display the GUI, you only have to run Python:
$ python2.6 output.py
Example
Let's compile Tabs and Pages in Dialogs/Tabs_pages3.ui from this tarball. Decompress the tarball and run:
$ cd path/to/the/extracted/tarball
$ pyuic4 -x -o Tabs_pages3.py 'Tabs and Pages in Dialogs/Tabs_pages3.ui'
Now run it through Python:
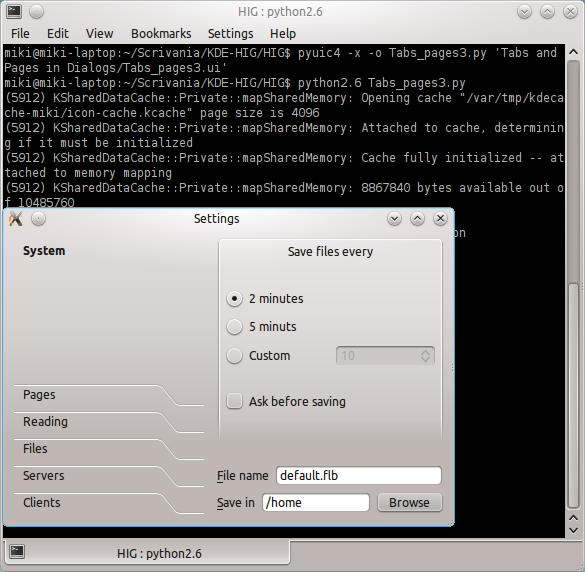
$ python2.6 Tabs_pages3.py
Here is a screenshot:
How to take and annotate a screenshot
To take a screenshot, you can use KSnapshot, which is included in standard KDE distributions. Search KSnapshot in Applications > Graphics > Screen Capture Program (KSnapshot) and set the options up. I use these options:
- Capture Mode -> Window Under Cursor
- Snapshot Delay -> 1-2 seconds
- Include window decorations -> True
If you need extra space (for annotations, for example) you may want to use:
- Capture Mode -> Region
Now press New Snapshot, take your snapshot and save it somewhere.
If you want to annotate your screenshot you can use Gimp. Install it with this simple command:
$ sudo apt-get install gimp
Open it and start drawing! I usually use brushes to draw circles, arrows, etc., pencil to draw sharp lines and text tool to insert text:
Notes:
- Text Tool
- Pencil
- Brush
You can also use Inkscape, a tool similar to Gimp. As above, you can install typing:
$ sudo apt-get install inkscape
How to create an archive
In this tutorial I will use Ark, but you can use any software you like!
Ark is a very simple program: open it and create a new archive clicking on New. Click on Add folder and select the folder containing the .ui files and all the screenshots.
In order to upload the archive you have to sign up KDE TechBase. Then you can upload your tarball here, clicking Upload a new version of this file. Very Important, you have to keep the same filename, i.e. HIG-UI-Files.tar.gz.


