Development/Tutorials/Plasma4/Ruby/Using widgets
This is a 'translation' of the Using widgets article on Python and Plasma. For the Python Tutorial see here.
Abstract
Using the paintInterface method to display applets is a powerful, and sometimes even necessary way of working. For example, when you want to display a SVG graphic. But it is not the only method available to create a Plasmoid, however. Plasma comes with a number of widgets "tailored" for use in Plasmoids. In this tutorial we will create a very simple "Hello, world!" Plasmoid using Plasma widgets.
Prerequisites
Set up your applet directory and create a metadata.desktop file as described in the Getting Started tutorial. Don't forget to change the X-KDE-PluginInfo-Name line to match the module used in the tutorial (RubyWidget), otherwise the example will not work!
The 'main.rb' file
Here is how our main.rb file will look like:
- Copyright stuff
require 'plasma_applet'
module RubyWidget
 class Main < PlasmaScripting::Applet
   def initialize parent
     super parent
   end
   def init
     self.has_configuration_interface = false
     self.aspect_ratio_mode = Plasma::Square
     self.background_hints = Plasma::Applet.DefaultBackground
     layout = Qt::GraphicsLinearLayout.new Qt::Horizontal, self
     label = Plasma::Label.new self
     label.text = "Hello world!"
     self.layout.add_item label
     self.layout = layout
     resize 125, 125
   end
 end
end
Let's take a deeper look at it. As in the main tutorial, we create our class by deriving from the PlasmaScripting::Applet class. In initialize, we quickly initialize the class. We use the init method instead to do all the dirty work of creating the applet and adding the widget needed to display the text.
First of all we tell Plasma that this applet does not have a configuration dialog (has_configuration_interface=). We then set the aspect ratio mode to a square (Plasma::Square). This is taken into account when someone resizes the applet. Next the background_hints= method sets the Plasmoid's background to the default Plasma background (Plasma::Applet.DefaultBackground) saving us from having to manually draw the background ourselves.
The third and most important step deals with creating a layout. It is a bit different than the standard Qt::LinearLayout seen in Qt, because it is done inside a Qt::GraphicsView used by Plasma. We want a simple, linear layout, and so we use a Qt::GraphicsLinearLayout, setting it to be horizontal (Qt::Horizontal).
Next we create a Plasma::Label. This is a widget that is Plasma aware and therefore uses all of the goodies provided by Plasma. For example, automatically changing its text color if the Plasma theme changes. We then use the text= method (analogous to the normal Qt::Label.text= method) to set our label text ("Hello, world!") and then add the label to the layout. Also, we set the applet's layout to be the one we have just defined using self.layout=. Finally we resize the applet to 125 x 125 pixels.
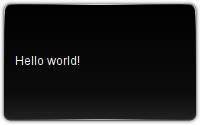
Once packaged and installed (see the Getting Started tutorial), the Plasmoid will look like this:

Conclusion
This brief tutorial shows how to use Plasma widgets with your applet. Beside Plasma::Label there are many more widgets that you can use.
Notice that at the moment you can only add widgets and create layouts directly in code. This means you can't use an application like Qt Designer to design the appearance of your applet.
