Archive:Development/Tutorials/Qt4 Ruby Tutorial/Chapter 11 (zh CN)
Template:I18n/Language Navigation Bar (zh CN)
Template:TutorialBrowser (zh CN)
Giving It a Shot

档案:
概览
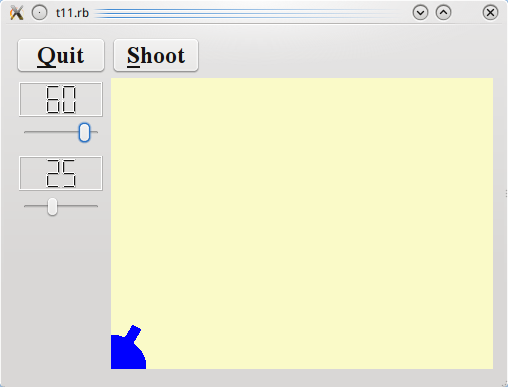
在这个范例中,我们引入一个定时器来实现动画的射击。
一行一行的浏览
CannonField 现在有射击能力了。
include Math
我们含入(include)Math,因为我们需要 sin() 和 cos() 函数。
@timerCount = 0
@autoShootTimer = Qt::Timer.new(self)
connect(@autoShootTimer, SIGNAL('timeout()'),
self, SLOT('moveShot()'))
@shootAngle = 0
@shootForce = 0
我们初始化新的私有变量,并且连接 Qt::Timer::timeout() 讯号到 moveShot() 槽。我们将在每次定时器超时(times out)时移动炮弹。
timerCount 会不断追踪发射后经过的时间。shootAngle 是加农炮发射时的角度,而 shootForce 是加农炮发射时的力量。
def shoot()
 if @autoShootTimer.isActive()
   return
 end;
 @timerCount = 0
 @shootAngle = @currentAngle
 @shootForce = @currentForce
 @autoShootTimer.start(5)
end
除非有炮弹在空中,否则这个函式会发射炮弹。timerCount 重设为零。shootAngle 和 shootForce 变量会被设定为当前加农炮的角度和力量。最后,我们启动定时器。
def moveShot()
 region = Qt::Region.new(shotRect())
 @timerCount += 1
shotR = shotRect()
 if shotR.x() > width() || shotR.y() > height()
   @autoShootTimer.stop()
 else
   region = region.unite(Qt::Region.new(shotR))
 end
 update(region)
end
moveShot() 是一个移动炮弹的槽,当Qt::Timer启动后,每5毫秒被呼叫一次。
它的工作是计算新的位置、更新屏幕上的炮弹到新的位置,并且在必要时停止定时器。
首先,我们建立一个 Qt::Region 来保留旧的 shotRect()。Qt::Region 有保留任何区域种类的能力,而我们将在这里用它来简化绘图。shotRect() 会返回炮弹现在位置的矩形。这在稍后会详细解释。
然后我们递增 timerCount,它影响炮弹沿弹道移动的每一步。
接下来,我们取得新的炮弹矩形。
如果炮弹已经越过 widget 右侧或底部边界,那么我们停止定时器,否则我们加入新的 shotRect() 到 Qt::Region。
最后,我们重绘 Qt::Region。这将发出只有一、两个矩形需要更新的单一的绘图事件。
def paintEvent(event)
painter = Qt::Painter.new(self)
 paintCannon(painter)
 if @autoShootTimer.isActive()
   paintShot(painter)
 end
painter.end()
end
绘图事件函式比起前面的章节已经简化。大部分的逻辑操作已经移动到新的 paintShot() 和 paintCannon() 函式。
def paintShot(painter)
 painter.setPen(Qt::NoPen)
 painter.setBrush(Qt::Brush.new(Qt::black))
 painter.drawRect(shotRect())
end
这个私有函式画出一个黑色填充矩形作为炮弹。
我们省略了 paintCannon() 的实作,它和前面章节 Qt::Widget::paintEvent() 的重新实作相同。
def shotRect()
gravity = 4.0
 time = @timerCount / 20.0
 velocity = @shootForce
 radians = @shootAngle * 3.14159265 / 180.0
 velx = velocity * cos(radians)
 vely = velocity * sin(radians)
 x0 = (@barrelRect.right() + 5.0) * cos(radians)
 y0 = (@barrelRect.right() + 5.0) * sin(radians)
 x = x0 + velx * time
 y = y0 + vely * time - 0.5 * gravity * time * time
 result = Qt::Rect.new(0, 0, 6, 6)
 result.moveCenter(Qt::Point.new(x.round, height() - 1 - y.round))
 return result
end
这个私有函式计算炮弹的中心点,并且返回封装炮弹的矩形。除了随时间推移而增加的 timerCount 外,它还使用加农炮起始的力量和角度。
这个公式使用的是重力场中无摩擦运动的标准牛顿公式。为简单起见,我们选择忽略任何爱因斯坦效应(Einstein effect)。
我们在y坐标向上增加的坐标系统中计算中心点。在我们计算出中心点后,我们建构一个大小为6×6的 Qt::Rect 并移动它的中心点到算出的中心点之上。藉由相同的操作,我们把这个点转换成 widget 的坐标系统(参阅坐标系统)。
唯一增加的是 Shoot 按钮。
shoot = Qt::PushButton.new(tr('&Shoot'))
shoot.setFont(Qt::Font.new('Times', 18, Qt::Font::Bold))
在建构子中,我们建立并设定了 Shoot 按钮,就像我们为 Quit 按钮作的。
connect(shoot, SIGNAL('clicked()'), cannonField, SLOT('shoot()'))
连接 Shoot 按钮的 clicked() 讯号,到CannonField 的 shoot() 槽。
执行应用程序
加农炮可以射击,但没有东西会被射中。
练习
使炮弹变成一个填满的圆。[提示:Qt::Painter::drawEllipse() 可能会有帮助。]
当炮弹在空中时,改变加农炮的颜色。
